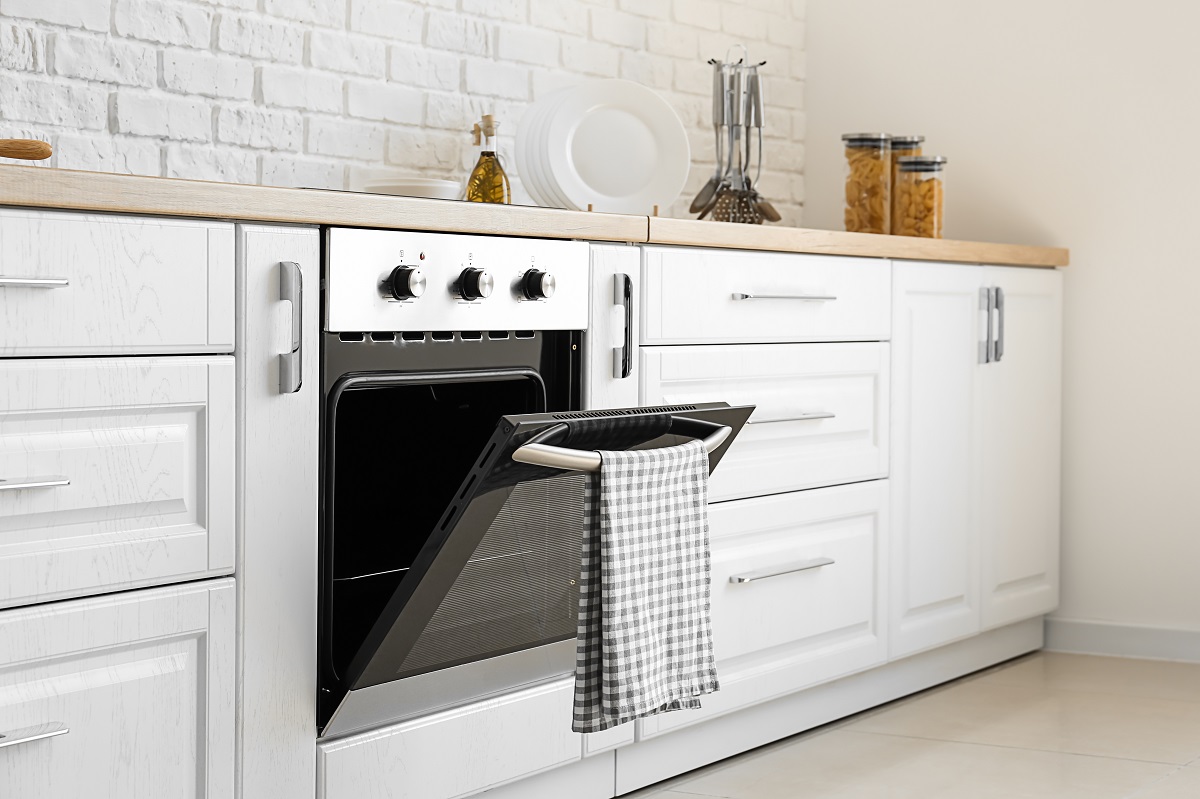
Summertime is the perfect time to make your way out onto your deck with a nice cold beverage and the beach read you’ve been meaning to get to. Unfortunately, just as you get ready to enjoy yourself, you discover your siding is a dirty, grimy mess. No one can enjoy Hello Beautiful when their own space is less than aesthetically pleasing. Time to break out the power washer!
How to get your siding squeaky clean
We should note: Most people use power and pressure wash interchangeably. There is a difference as power washing involves a heating component. They have the ability to sanitize because they use steam power. However, homeowners generally own pressure washers, and professionals own power washers.
That’s why it’s recommended you hire a professional to power wash your home. Highly pressurized water that can reach temperatures of 311℉ flowing at speeds of over 200 mph can really do some damage to your property but more importantly to your person. So if your home is in need of a shower, consider calling a professional.
However, DIY homeowners are able to rent power washers from local big box home improvement stores. If you are looking to power or pressure your home yourself, then here’s how to do it.
Step 1: Gather your materials and prep the pressure washer.
Before beginning the job, gather the supplies needed with a strong focus on safety. You will need:
A pressure washer.
Mold/mildew remover.
Brush.
Garden hose.
Extension wand or scaffolding if cleaning a taller home.
Duct tape.
Personal protective gear (goggles, gloves, and closed-toed shoes).
Remember that pressure washing is a physically demanding job full of bending and reaching and only works on certain types of surfaces. Do not pressure/power wash certain types of stucco or fiber cement siding.
When deciding when to pressure wash, choose a mild day. (Some climates may need to wait until spring or fall.) Not only can the summer sun dry the cleaning solution too quickly, but it can also dehydrate you and may be too much for such a physically demanding job.
Step 2: Prep the area.
Cover any area where water might enter your home with duct tape, such as outlets, light fixtures, cameras, and video doorbells. Inspect the house and cut away any vegetation that is touching the areas you are going to power wash.
If you are using a plant-friendly detergent, you don’t need to cover your plants. However, it is still a good idea to limit the amount of detergent that your plants take in.
Using the low pressure tip, spray your plants with water before you start to pressure wash. Make sure you are using the low pressure tip or you could damage your plants.
Step 3: Spray on the detergent.
Add the cleaning solution to your pressure washer, and attach a garden hose. Turn on the motor to start the flow of water. Starting from the bottom, spray the detergent onto the surface, working in 10-foot sections. You don’t want the detergent to dry before you are able to wash it off.
Step 4: Get cleaning.
Work top to bottom when rinsing.
Switch the tips on the wand to one that will work best for your job. The most common is the white 40-degree spray nozzle. This will allow the water pressure to increase but not all the way. Working from the top down, start washing the house.
Remember to never use a ladder when pressure washing. If you have areas you cannot reach, use an extension wand or portable scaffolding.
Step 5: Rinse and repeat.
Repeat the process of spraying the detergent and then rinsing it off until you have pressure washed your entire house.
When choosing a pressure washer, you are going to be dealing in PSI and GPM. That’s what the cool kids call Pressure per Square Inch and Gallons Per Minute. The higher the PSI and GPM, the faster the pressure washer will clean. Of course, all that power comes with a cost.
Picking the perfect pressure washer
Electric or gas, which is best for you?
The second big factor you need to consider to power wash your home is whether you prefer a gas- or electric-powered pressure washer. While gas-powered pressure washers will have a higher PSI and GPM than electric ones, that doesn’t mean they are the right choice for your home.
Because they are more powerful, gas -pressure washers tend to be a bit more difficult to control and can damage delicate surfaces. As stated earlier, the more power, the higher the price tag, so a gas-powered pressure washer will tend to hit your wallet a bit harder, too. Another thing to consider is like any gas engine, they require a certain amount of maintenance, which is much more than their electric counterparts.
If choosing the right equipment and then pressure washing your house seems too difficult, remember – hire a pro.
How much does it cost to power wash a house?
If you choose to hire a professional, the cost to power wash your home varies by region, but nationally, the average ranges from $.15-$.75 per square foot. So assuming you have a 2,500 square foot house, the average range is about $375-$1,875.
How often do you have to power wash your house?
Most experts suggest power washing your home once or twice a year to keep your curb appeal…well, appealing, as well as keeping mold and mildew from forming. That’s why it’s a good idea to add this task to your list of annual home maintenance, along with flushing your hot water heater and cleaning your dryer exhaust vent.
Stay on top of home maintenance
Homeownership can be hard, but it doesn’t have to be. The vipHome.app can help. In less than four minutes, enjoy a new way to manage your home. Simply download the app, register your home, and enjoy a simplified homeownership experience.
Summer 2023 is already off to a sizzling start. An early heat wave hit the southern states in early June, and with the reemergence of El Niño, some parts of the country are in for a sun-sational summer. Is your air conditioner up to the challenge? Our experts put together these quick HVAC tips for summer to help you chill out and enjoy the season.
Overall, air conditioners and/or HVAC units are an easy appliance to maintain. Central air conditioners generally require:
Regularly replacing or cleaning the air filters.
Cleaning the evaporator
Fixing bent coil fins.
Scheduling an annual or biannual servicing.
Replace or clean your HVAC air filters
Air filters need to be cleaned or replaced as per manufacturer’s instructions. This task may need to be done as frequently as once a month or as rarely as once a year. (Many air filters need to be changed or cleaned once every three months.)
When was the last time you replaced your HVAC filter?
How to replace an air filter
While all HVAC units may have a slightly different process, here are the general steps to replacing an air filter:
Remove the access panel.
Take out the used filter.
Insert the new filter. (The arrow on the filter generally should point in the direction of the air flow.)
Close the access panel.
Turn the unit back on.
Always check your manufacturer’s instructions before completing any maintenance.
How to clean an air filter
If your filter needs to be cleaned and not replaced, the following steps apply to your unit:
Remove the access panel.
Take out the filter.
Use your shower or garden hose (outside) to clean the air filter.
Spray the clean side of the filter, not the side with the accumulated dust or dirt.
Reinstall the filter after it has completely dried.
Close the access panel.
Turn the unit back on.
These are generally the same steps for cleaning wall unit air-conditioning air filters, too, but remember – always check the manufacturer’s instructions before completing any maintenance.
How to clean your evaporator coils
A clean condenser is a more efficient condenser.
Cleaning evaporator coils happens less frequently, generally once a year, though you can keep the coils clean longer by keeping the area around the unit (about two feet) clear of leaves, tall grass, branches, etc.
You can clean evaporate coils a few different ways. With compressed air, blow air in the opposite direction than normal air flow and not at an angle, which can bend the coils. Then, you can clean the debris with a shop vac.
Be careful, though. Fins can easily bend! After removing the debris, clean the fins with detergent or a garden hose. If at any time you’re not sure how to complete this, call a professional technician.
If you do happen to bend coils, the coils can restrict the unit’s flow of air. A “fin comb” can be used to easily move the coils back to their original position.
Don’t forget about an annual servicing
You should hire a licensed professional to perform AC maintenance, ideally twice a year – once before summer’s heat arrives and once before winter’s cold temperatures roll in. A licensed HVAC contractor will perform all the annual air conditioner maintenance that you shouldn’t tackle, such as:
Inspecting all the unit’s moving parts.
Checking refrigerant level and ensuring there aren’t leaks.
Cleaning fans and coils.
Clearing clogs in the condensate drain.
Repairing or replacing the wiring, electrical connections, motors, and belts if necessary.
Ensuring accuracy of the thermostat.
Checking for seal duct leakage.
How much does AC maintenance cost? According to Forbes, an AC service can cost between $80-200, depending on the size of your unit and where you live. A large AC/HVAC system servicing can cost more than $450, not including any repair costs.
How to care for a room AC unit
Room air conditioning units require less maintenance. Clean the air filter(s) as per manufacturer instructions. These air filters generally need to be cleaned more frequently, such as once a month or once every few weeks.
Also, make sure to plug the unit directly into a GFCI outlet. Never use an extension cord. Small room air conditioners (drawing less than 7.5 amps of electricity) can be plugged into a usual 120-volt outlet, though it should be the only appliance or item plugged into that outlet. Larger air conditioners will require a 240-volt outlet, which requires professional installation.
Troubleshooting common issues with your HVAC/AC system
Is it not getting cool in your house? Or is your unit freezing up? Here’s what you can do.
Check your doors and windows
Different air-conditioners have different environmental requirements. If you have a central HVAC unit, make sure to have interior doors open, so air flows well from one room to the next. If you have a wall unit, then you should close interior doors to keep the immediate area cool. In both cases, close all the home’s windows and exterior doors, so the cold air doesn’t escape.
Also, check your ceiling fans to make sure they are spinning in the correct direction – counterclockwise. This will push the cool air down toward you.
These tips can also help you to save energy and save money!
Reset the circuit breaker
If your unit won’t turn on, check your circuit breakers. Your HVAC unit should have its own circuit breaker that may have been tripped or your wall unit may have tripped its outlet’s corresponding breaker. In both cases, give the unit five minutes to cool down before resetting the breaker.
A central air conditioner also has a high-pressure limit switch, which can trip. If this happens, the switch can be reset by pressing a button located in the compressor’s access panel. (Always check the manufacturer’s instructions and when in doubt, call a professional.)
What to do when your HVAC freezes up in summer
Does your HVAC unit look like this?
If you notice your unit’s condenser coils are covered in frost, you may have a refrigerant leak. This usually happens when the unit is also blowing warm air and there’s a faint hissing or gurgling noise. You may also see a spike in your energy bills as the unit has to work harder to keep your home cool.
Unfortunately, leaking freon, a frequent refrigerant, can also cause headaches, nausea, sore throat, difficulty breathing, vomiting, and more. If you suspect your unit is leaking refrigerant, call a professional to investigate. If you’re not feeling well, seek medical attention.
Your condenser runs all the time
That’s not a good thing. Your air conditioning system should only run two to four hours a day intermittently. It could be that your condenser is dirty and needs to be cleaned (see how above). However, it might also be:
An issue with the fan.
Your weatherstripping is old and lets the cool air escape.
Your air filter needs to be changed or is the wrong size.
Your programmable thermostat may not be working properly.
Homeownership can be hard, but it doesn’t have to be. The vipHome.app can help. In less than four minutes, enjoy a new way to manage your home. Simply download the app, register your home, and enjoy a simplified homeownership experience.
Laundry can be the bane of your existence. However, when your machine won’t turn on, you hear a clunking sound, or see water around the base, you suddenly remember just how very precious your washing machine really is. That’s why we’ve compiled eight of the most common washing machine issues, along with how to fix them, so your clothes can be clean and smell springtime fresh.
Issue #1: Your washing machine smells like a gym locker.
Your washing machine is supposed to help get your teenage son’s clothes smelling like daisies, but how can it when your machine itself smells like week-old socks? Or even worse, mold?
Each manufacturer has its own recommended way of cleaning your washing machine, so it is best to check your owner’s manual. However, there are a few tips that are universal.
Many newer machines have a tub cleaning cycle. Before using it:
Mix ¾ cup of bleach with one gallon of water, and use it to clean the door and the opening of the drum. (Always use a microfiber cloth!)
Continue to wash the rest of the drum with the solution or run the machine’s clean cycle.
Once the cycle has finished, leave the door open to allow for air drying.
To keep the smell out of your machine, try not to leave wet clothes inside. If you already have a smell, don’t fret. Just clean out the tub once a week for three weeks to help mitigate the scent. Then clean your washing machine tub once a month.
(This tip may have been inspired by Content Writer Susie.)
Issue #2: There’s a whole lotta shakin’ goin’ on.
If you are running your machine and it starts walking away, don’t take it personally. It most likely means that you just need to re-level the unit. Adjust the legs, and double-check that you have the proper set up by using a bubble level.
If the problem happens only on occasion, it could simply mean that you have an uneven load in the machine. It is always best to do a full load of laundry and the Goldilocks amount when the drum is ¾ of the way full. Bonus, an uneven load can be the reason your drum isn’t spinning, so make sure you always fill your washing machine properly.
Issue #3: The cycle is done, but the water remains.
When was the last time you cleaned your washing machine filter?
You hear the ding alerting you that your wash is ready for the dryer, but when you go to take it out, you notice a pool of water at the bottom of the drum.
Most of the time this is not as serious as you might think. Oftentimes, it is just a clog. Check your filter and remove any debris that got in the way. (You might even find that missing sock.) Add cleaning out your filter to your monthly to-do list to prevent this from happening again.
Issue #4: What happened to the water?
The cycle is set to start, but nothing happens. The water does not start to fill. This is another one of those problems that is usually deceptively simple to fix. Most of the time, the issue has to do with your hose.
Check the intake hose and see if there are any kinks or damage or if the connection is loose. If there is a problem, replace your hose, and better yet, replace it with a braided metal hose to prevent this issue from happening again.
Issue #5: There’s water, water everywhere.
Do you have braided metal hoses?
Walking into your laundry room and discovering a leak is never fun. It may seem counterintuitive, but the reason your washer had no water could be the same reason you have too much water!
The problem may be the drain hose. It may have gotten punctured or the connection might have come loose. I don’t know if you’ve heard, but upgrading your hose to a braided metal hose may prevent this issue from happening again. Braided metal hoses are much less likely to burst and cause a flood.
If you already have braided metal hoses, then the next step is to take a gander at your washer’s washers. They may have become misshapen or have deteriorated. If this has happened, they will not be able to keep the water in like they once did. Replace any washers that are no longer working.
Issue #6: Ripped jeans might be fashionable but holey shirts?
So this one may be a case of it’s not them, it’s you.
Check what you are throwing into your washing machine. Mixing super delicate items with heavier clothing articles like denim can cause your clothing to tear. Open zippers, hard buttons, studs, rhinestones, and hooks can also cause your clothes to tear or puncture. Always fasten, button, or hook all clothing before putting it in the machine.
Another issue could be what you left in your pocket. Sharp or hard items can cause issues for your clothing. Always remember to empty out your pockets before loading the washer.
Issue #7: Soapy shirts
If your clothes still feel soapy or gritty after a wash, this might be caused by overloading your machine. Leave some room at the top of the washer, so the detergent dispenser can evenly distribute soap over the entire load. If your clothes tend to have a lot of pet hair or dirt, run a rinse cycle after you have placed your clothes in the dryer.
If you have determined it is not you but in fact the machine that is the culprit, check the drum. Using a flashlight, visually inspect the inside of your washing machine for any dents or divots. While you are in there, look for rust. It’s best to call a professional to resolve either of these common washing machine issues.
Issue #8: You pull and pull, but the door won’t open.
Door stuck? There are two reasons!
Front loading washers lock their doors when water starts to flow into the drum to prevent someone from opening it and flooding your floor. However, if the cycle is over and the door still won’t open, then you have one of the most common washing machine issues. There are two main causes: water or heat.
If there is water still in the drum after the cycle has run, then you might have a clog. (We talked about this before. See tip #3 for help solving this problem. – Content Writer Megan)
The other common issue is that your machine may have become overheated. This happens when your machine has been working too hard, e.g. you’ve run load after load after load with hot water. When your machine cools down, the problem should rectify itself.
If there is no water and your machine has not overheated, there could be an error with the internal computer which requires a washing machine professional to fix.
Prevent home problems from occurring!
Homeownership can be hard, but it doesn’t have to be. The vipHome.app can help. In less than four minutes, enjoy a new way to manage your home. Simply download the app, register your home, and enjoy a simplified homeownership experience.
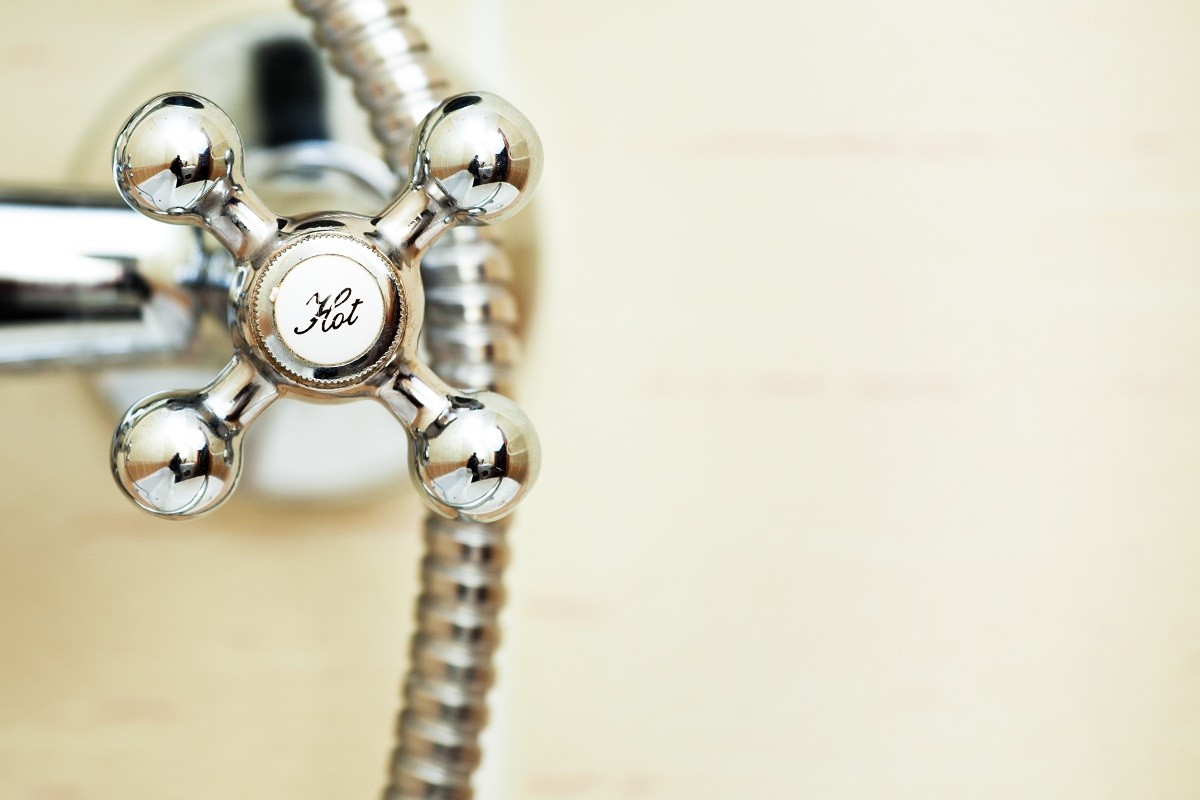
Buildup, sediment, and corrosion – these words should strike fear into the heart of every homeowner. These items can cause your hot water heater to leak, stop working, or even explode.
To find out how to save your hot water heater (and your warm showers), read on!
Should I flush my hot water heater?
Ideally, you should flush your hot water heater at least once a year. The reason why is – minerals and debris from your water can actually build in your hot water heater and create clogs. These clogs can cause the unit to work inefficiently, malfunction, or stop working. Say bye-bye to those relaxing, hot baths and hello to higher energy bills!
Leaks can happen when you don’t take care of your water heater!
Before you head down to your basement or utility closet, first check to see if your hot water heater has been flushed or drained in the last five years or if the hot water heater is younger than five years old. (The vipHome.app keeps all your home info in one place, including the age of your hot water heater!)
If you said yes to either of the above items, then you should absolutely flush your hot water heater. You should also continue to flush it out annually, so your unit lasts longer.
However, if you’ve never flushed your hot water heater (Boo!) or it’s more than five years old, then check with your professional plumber. All the sediment buildup can actually cause more damage if you try to remove it.
How to flush a hot water heater
Every hot water heater is a bit different, so consult the manufacturer’s instructions before completing any maintenance. Our experts put together a general step-by-step guide that can help with a gas or electric heater. If you have a tankless water heater, make sure to contact a professional plumber.
Also, if you are at all uncomfortable, always call a professional to complete home maintenance.
1. Turn off the water supply.
Look for switches such as this.
You should be able to do this on the unit itself or from the shut-off valve on the water main running into your home.
2. Turn off the heat source to your water heater.
This step will help to prevent damage to the unit’s heating element. Your owner’s manual will tell you the best way to turn off the unit’s heat source, but if you have an electric hot water heater, you may be able to turn it off from the breaker box. If you have a gas hot water heater, there may actually be a setting for this step. When in doubt, always consult a professional plumber.
3. Allow your water heater to cool.
If you don’t, you could get scalded or burned. The cooling process can take a few hours, but you can speed it up by washing clothes in hot water or taking a longer-than-average shower.
4. Attach a garden hose to the drain valve.
Place a rag under the connection point (to catch any drips).
Make sure you have the hose flowing into a bucket, a drain, or even outside. Absolutely, under no circumstances, should you drain the hot water heater into your sump pump basin. The sediment can clog your sump pump mechanics and cause even more issues!
5. Turn on the hot water in a nearby sink.
This helps to prevent a vacuum from forming in your pipes and allows the water to flow out of your tank. Some experts suggest you turn on a faucet on the level above the hot water heater.
Also, grab a rag. No doubt, water will spill somewhere!
6. Slowly and carefully open the drain valve.
Be careful as the water might still be hot!
Let all the water drain out of the unit, and then close the drain valve. Turn the water to the unit back on and fill the tank once more. This should lift any sediment off the bottom. Turn off the water and drain your water heater again.
Repeat the fill and drain process until the water runs clear.
7. Clean up your tools and turn on the unit.
Close the drain valve, remove the hose, and once more turn on the water to the unit. Then, refill the tank and turn back on the heat source to your water heater.
You should also turn on the hot water in a nearby sink to allow all the air to come out of the system. The water will come out in spurts to begin. Don’t worry! That’s normal.
How often should I flush my water heater?
It is recommended that you flush your water heater at least once a year. (Make sure to check “Should I flush my hot water heater?” above!) If you have hard water, you might want to flush your hot water heater every six months or even install a water softener.
Want more step-by-step guides? Check out the vipTips, expert tips from sources like FEMA, the Department of Energy, and more in the vipHome.app!
Take care of your largest investment – your home!
Download the app today!
Homeownership can be hard, but it doesn’t have to be. The vipHome.app can help. In less than four minutes, enjoy a new way to manage your home. Simply download the app, register your home, and enjoy a simplified homeownership experience.
Rising utility bills, rolling summer blackouts, and the drastic effects of climate change have led many to wonder, “What can I do to help lower my energy consumption at home?” You may be surprised to learn a home energy assessment can provide the answer.
A home energy assessment, AKA home energy audit or home efficiency assessment, is a comprehensive evaluation of the energy use of a home and provides recommendations to improve the home’s comfort, health, and safety.
“The assessment really helps you understand how your home is working and where its deficiencies are, as well as opportunities to save energy and money, says Steve Dunn, technology manager, Home Performance with ENERGY STAR.
We spoke with Steve and his colleague Scott Minos, who leads the Department of Energy’s Energy Saver Program. He shared what you need to know about a home energy assessment, why now is a great time to get one, and quick efficiency tips to help you jump-start your energy saving efforts at home.
When to schedule your home energy assessment
Home energy assessments are informative for homeowners of both existing homes and new construction, including ENERGY STAR certified new homes and apartments, which are independently inspected by a third-party energy rater to verify their energy performance
“For a new home, it provides you a baseline such as a Home Energy Score,” Scott said. “In existing homes, the assessments can be useful, particularly for older homes.”
“If you’re noticing rooms that are either too warm or too cold, high-energy bills, or indoor air quality issues such as high levels of dust in the home, those are all good indications that there are some issues that need to be addressed,” says Steve, who led national efforts to advance state clean energy and climate change policies and initiatives for the Environmental Protection Agency before joining DOE.
A home energy assessment can help to identify and prioritize functions that are costing you more money or creating safety issues.
“The home functions as a system, so there’s interaction between components,” says Steve. “When systems are updated or replaced or the home envelope is sealed and insulated, that could cause changes to things like moisture movement and indoor air quality.”
While a home energy assessment is not an annual need, homeowners may want to consider one if there’s a major improvement or change that could impact the performance of the home’s systems. Even homes built just a few years ago may not have the latest technology or meet the latest energy efficiency guidelines.
How to prepare for an energy assessment
Have your utility bills handy!
Prior to your appointment, homeowners should complete the following tasks:
Prepare basic information for the assessor or energy auditor, including the number of people living in the home, occupancy patterns, typical set points for the thermostat(s), and any major improvements planned.
Collect past energy bills to help the assessor benchmark and understand the historical energy consumption and types of fuels used in the home.
Create safe access points to the different areas of the homes exterior and interior, including the mechanical systems, attic, basement and/or crawl spaces, and duct registers within individual rooms.
Depending on the complexity of the home and the number of systems installed, a home energy assessment typically takes one to three hours. A larger home or a home with multiple systems will take more time.
What to expect during a home energy assessment
“The assessment starts with an interview with the homeowner, and that’ll include a discussion to identify any specific issues in the home, such as comfort or drafts, and as well as the living patterns,” says Steve.
The assessor will then review the energy bills and the fuel consumption of the home before moving onto a visual inspection. This part will include the home’s exterior, interior, insulation levels, the condition of mechanical systems, drainage and ventilation, as well as any ceiling fans and kitchen or bathroom exhaust fans, and any whole house ventilation systems that may exist.
Potential diagnostic tests
Your home will be put to the test!
The assessor may also conduct a number of diagnostic tests, including:
A blower door test, which measures the amount of air infiltration or leakage in the home.
A thermographic scan with an infrared camera, which identifies areas of air leakage, such as areas around windows and doors as well as walls, floors, attics, and other spaces.
Combustion appliance zone (CAZ) testing to ensure that appliances using gas, propane or other thermal fuels vent properly, so there isn’t any potential carbon monoxide hazards in the home.
Energy assessments can also identify potentially any safety issues in the home, such as carbon monoxide from combustion appliances, electrical hazards, and minor or major natural gas leaks in the home.
Get energy-saving tips from your accessor
Adjust your habits.
A home energy assessor not only analyzes your home systems and their functions, but also learns about the homeowners’ behaviors related to energy usage.
“The assessor will want to observe how the owners use the home, how they wash their clothes or whether they close blinds or use other window coverings, things of that nature,” says Scott. “They might have different kinds of input and advice based on just behavior.”
Some behavior-based recommendations may include washing clothes in cold water as opposed to hot or even warm water; adding window coverings to a certain part of the home; setting the thermostat at a certain degree, etc.
“This way, homeowners can understand their own energy conservation efforts and how their behavior can result in savings,” says Scott.
As a final step in a home energy audit, the assessor will use modeling software, including the DOE’s Home Energy Score tool or a third-party commercial energy software, to develop a prioritized list of recommendations for improvements. This will include any recommendations related to health, safety, and comfort, and prioritize the improvements based on the cost benefit to the homeowner.
Home energy audit cost and options
Home energy assessments generally range between $200 to $600, depending upon the specific tests completed. However, the Office of Energy Efficiency & Renewable Energy has a system that provides a home energy audit for less.
“The DOE Home Energy Score tool is on the lower end of that range,” says Steve. “It provides recommendations and typically takes less than an hour.”
EERE also recommends homeowners contact their utility companies. Some offer free home energy audits or energy assessments at a discounted rate for their customers. The recent Inflation Reduction Act provides up to $150 in tax credits for your home energy assessment. (More on that in a moment!)
Another option for homeowners is a virtual energy assessment. This type of audit is conducted remotely and in some cases with a smartphone or other device. (vipHomeLink offers a Virtual Home Checkup, which provides energy-saving tips!) In this case, the homeowner will walk around the home and highlight certain systems and areas for the assessor.
“That’s obviously not as detailed as an on-site assessment,” says Steve, “but it can help identify if there are opportunities for making energy improvements that might be supported by doing further on-site testing diagnostics.”
Take advantage of rebates and tax credits
Homeowners should look into rebates that may be available through their utility companies and the government for installations. Low-income households may qualify for assistance through the weatherization assistance program, income-qualified programs offered by their local utility, or from state and local housing agencies.
Keep your home warm and cozy.
“Some utility companies offer what’s called a direct install where they will install improvements at no cost to the homeowner,” says Steve. “This might include things like weather stripping around windows and doors, possibly installing a smart thermostat.”
“There was an existing tax credit that had a lifetime limit of $500 for home energy efficiency improvements,” explains Steve. “That’s now becoming a $1,200 annual tax credit with $150 allotted for home energy audits.”
Some homeowners can receive a 30% tax credit on eligible home improvements, including exterior doors that meet ENERGY STAR requirements; exterior windows and skylights that meet ENERGY STAR’s most efficient certification requirements; and other qualified energy equipment, such as central air conditioners, electrical panels, certain water heaters and furnaces.
Homeowners can receive tax credits for installing heat pumps!
Homeowners who install heat pumps, heat pump water heaters, biomass stoves and/or boilers, can receive up to $2,000 in tax credits, which are separate from the $1,200 annual credit.
To take advantage of rebates and tax credits, homeowners can:
Reach out to their utility companies (which may also offer financing for large home energy projects).
Explore the DSIRE website for information about financing and incentive programs for energy efficiency and renewable energy, including financing programs available by state.
Speak with their home energy assessor, who can also provide rebate options and information.
Top tips to jump-start your energy-efficiency efforts at home
EERE stresses the importance of a professional home energy audit, but there are some things homeowners can do to increase the energy efficiency and safety of the home. Scott shared with us quick ways to jump-start your energy-saving efforts!
Homeowners should make sure to use ENERGY STAR Certified LED bulbs, which use up to 90% less energy and last up to 25 times longer than traditional incandescent bulbs. Also, select ENERGY STAR Certified light fixtures, especially for outdoor fixtures with features such as automatic daylight shut-off and motion sensors. Also, make sure the home’s lighting is up to the modern electrical code and local standards.
Check insulation levels
If you have easy access to your attic, see if you have adequate levels of insulation and if the home is well insulated and sealed. (If you’re not sure about your home’s specific type or insulation levels, check out Energy Saver’s page on insulation!)
You should also check for air leaks around the usual suspects – windows, doors, and your roof.
“There’s some low-tech ways to definitely check for air leaks,” says Scott. “This can even help reduce your energy bill by 10 to even 20%.”
EERE recommends completing simple tests using a dollar bill, an incense stick, and a flashlight – not all at the same time, of course. Learn the three simple tests to detecting drafts on the Energy Saver website!
Monitor plug loads
Unplug your chargers.
Plugged-in items use 30 to 40% of the total energy consumption in the home. Even when they’re not in use, they still consume energy.
“Using power strips or other smart home devices can have a big impact on the energy bill,” says Steve.
Smart home devices and smart strips can help to resolve these standby modes,” and if homeowners forget to turn off a device, they can do so from an app on their phone.
“The whole home energy monitors are designed to connect to the electrical panel and can help identify appliances that may be operating inefficiently or help to find where the most intensive energy uses are occurring,” says Steve.
Complete proper appliance maintenance
Check your appliances and make sure they’re running well. Also, complete home maintenance tasks, such as cleaning your refrigerator coils, vacuuming your dryer exhaust vent, and changing your HVAC filters regularly. (The vipHome.app can remind you to do these energy- and money-saving tasks!)
This also includes completing your annual or bi-annual heating and cooling system maintenance as well as hot water heater maintenance.
“Both extend the life of the equipment and ensure its operating efficiently,” says Scott.
As we know here at vipHomeLink, the importance of home maintenance cannot be understated.
“Doing regular maintenance is always important as it makes sure that the house is working well,” says Steve. “This is really about home performance, and before it can perform well, it needs to be maintained.”
Join the neighborhood!
Download the app now!
Homeownership can be hard, but it doesn’t have to be. The vipHome.app can help. In less than four minutes, enjoy a new way to manage your home. Simply download the app, register your home, and enjoy a simplified homeownership experience.
Our phones are smart. Our cars are becoming smarter. It was only a matter of time before our homes followed suit. Of course, smart homes are more than just “cool.” Their security measures can help safeguard your largest asset and your most precious loved ones.
If you’re not sure how to make your home “smart,” our experts put together this quick go-to guide to get you started!
What you need to consider before starting your smart home journey
One of the first tips to a successful smart home tech journey is deciding if you’re going to DIY the installation or go all in with PSE (“pay someone else” to do it). If you’re not tech- or home-savvy, you may want to consider getting a home security system installed. Many security companies have a team who will install the smart home tech devices for you.
If you’re going the DIY route, then follow these simple tips:
Tip #1 – Create a plan for your smart home journey.
While you no longer have to stick to one company (Google, Amazon, Yale, GE Lighting, etc.), some smart home devices are not compatible with others. This may change as of this year with Matter, a new connectivity standard. Matter may be able to connect individual smart home tech products from more than 50 companies, but only time will tell if its implementation works. Until then, check to see if the devices you want in your home are compatible with each other.
Tip #2 – Set up a second router.
Protect your devices with a second router.
If you’re going to be using Wi-Fi for your devices, then consider setting up a different router from your current home one. This should help to keep your devices running quicker and also keep your devices safe(r). If your home router or your smart home router is hacked, the devices on the opposite router won’t be compromised.
Tip #3 – Or skip the Wi-Fi.
If you don’t trust your Wi-Fi, then consider connecting your smart home devices to a Z-wave mesh network. This type of network uses low power and a different frequency than Wi-Fi, so it won’t interfere with your non-smart home devices. It also uses the same encryption as online banking and is used by nine out of 10 of the leading security companies. With this network, you shouldn’t get your smart thermostat hacked and upped to 90°F.
Since some smart home devices double as security devices, many insurance companies offer discounts for homeowners who install them. Just make sure that if you get a discount, you use your smart home devices. If you forget to charge your Ring doorbell and someone happens to break in that night, your theft claim can be denied.
Tip #5 – Explore the possibilities.
Between smart light bulbs that can turn different shades to refrigerators that can tell if you’re out of milk, the possibilities are (almost) endless when it comes to smart home technology. Make sure you take advantage of all smart home technology has to offer, including the ability to change the thermostat without ever getting out of bed. Welcome to the future!
Starter smart home tech
So where, exactly, do you begin your smart home journey? Here are a few products that are easy to install that can improve the safety and comfort of your home!
Step #1 – Start outside with a video doorbell
Indoors safety starts by protecting the exterior of your home, and a video doorbell is a first easy step into the world of smart home safety. A video doorbell allows you to see and speak with a visitor on your doorstep, even when you’re not home. If a “porch pirate” or burglar walks up to your front door, you’ll have them on camera.
Step #2 – Protect your home’s exterior
A natural next step is to install motion-activated cameras and lights around your property. These protect your property by illuminating dark areas and potentially catching would-be burglars off guard. They are also a plus if your trash bins usually get ransacked by raccoons or bears, though sometimes the sudden light will not scare off those creatures of the night.
Step #3 – Head indoor with cameras
If you’re looking for safety or to see your children come home from school, then indoor cameras may be next on your list. Just make sure to do your due diligence. Some cameras – even pet cameras – have been hacked, so you may want to consider getting cameras that record locally and don’t use a cloud service.
Step #4 – Warm up to the idea of smart thermostats
Turn up your comfort!
While programmable thermostats have been touted for some time as being energy efficient, smart thermostats take your energy-saving efforts up a notch. Forgot to turn down your thermostat before leaving home? You can do it from an app on your phone! If you keep your thermostat low during the day to save energy, then you can turn it up when you’re on your way home and turn it down again when you’re getting into bed – all from an app.
Step #5 – Go all in with the sensors
Whether you have the latest PlayStation, a large screen TV, or Wayne Gretzky’s hockey stick, one of the best ways to protect your home (and stuff!) is with a home security system. Experts say that a home with a security system is 300% less likely to be burglarized than a home without one, and most models not only have central monitoring but also additional safety features. Many come with smoke and carbon monoxide monitoring, water sensing, and even panic buttons.
Before you decide on your security system, check the different packages and inclusions, so you can choose the system and plan that best protects your home and family.
Enjoy a new way to manage your home
Homeownership can be hard, but it doesn’t have to be. The vipHome.app can help. In less than four minutes, enjoy a new way to manage your home. Simply download the app, register your home, and enjoy a simplified homeownership experience.
Last October, one of our team members returned home from a vacation to find three inches of water in her basement. Unfortunately, her water heater, dryer, washer, and mini fridge all received a not-so-clean bath, but she was fortunate that the flood didn’t create additional hazards.
“During flooding situations, gas appliances may be stirred, shifted or broken away from the supply line, causing a dangerous gas leak situation,” says Paul Pirro, Manager Technical Support – Appliance Service, Gas Asset Strategy – at PSE&G. “Plus, any electric appliance or equipment can also shift or experience a pull on the connection or cord, causing an electric short-circuit or sparking.”
While flooding itself may not be preventable, Paul shared with us appliance safety tips to help you prevent storm damage and lower your risk of a home fire or worse!
Before a severe storm hits your area
One of the first steps to preventing a hazardous situation is to turn off the gas to appliances.
“During an emergency storm situation, it may not be possible to get immediate assistance,” says Paul, who has been in the utility industry for more than 40 years and recently received the American Gas Association’s Diamond Award of Merit. “Having shut-off valves in good-working condition would be recommended and preemptive.”
Shut off your appliance gas valves.
Newer gas valve shut-offs are easily turned by hand, but older valves may require tools to operate. If you have any questions, always contact a professional.
When it comes to electrical appliances, all non-essential appliances and equipment should be unplugged, shut off, and secured.
“Electric appliances especially can experience a surge once PSE&G turns on the electric after it’s off,” says Paul. “Even if an appliance is off, but it’s still plugged in, it can still experience a surge and possibly get damaged.”
If you live in an area prone to floods and storm damage, consider moving any appliances or equipment to higher levels of your home.
“Unfortunate folks who have experienced more than one flood event tend to move a lot of their appliances to a second floor,” says Paul. “A preemptive installation for this equipment to a higher elevation should be performed by a professional who is trained and qualified.”
What to do in the event of evacuation
You want to leave your home as safe as it can be. Therefore, it’s important to shut down or disconnect any unnecessary equipment or appliances that may get damaged.
As mentioned earlier,gas valves supplying individual appliances should be shut off if severe flooding is expected. Also, all exposed electrical connections should be unplugged or disconnected to prevent electrical shorting and damage.
In the event of evacuation, you can shut off the gas valve at the meter to minimize the chances of gas leaks occurring inside the home. Paul provides these quick steps:
First, locate the gas meter inside or outside of their home. The inlet pipe should be next to it. (See diagram on PSEG website.)
Turn the gas off at the main shut-off valve on the inlet pipe by using a 12-inch adjustable wrench or another suitable tool.
Turn the valve a quarter (1/4) turn in either direction until the valve is crosswise (perpendicular) to the pipe.
Courtesy of PSE&G
Also, secure furniture, boxes, and any potential clutter away from doorways and windows that could prevent access to appliances if rooms become flooded.
Dealing with home floods and electrical hazards
Your home flooded. Now what?
Your safety is first and foremost when it comes to dealing with floodwater. Never step into a flooded basement or any other room.
“Floodwater may be in contact with electrical outlets, appliances, or cords,” says Paul. “The water could be energized, causing shock or electrocution.”
Don’t touch appliances if they are surrounded by water and stay away from the breaker box in a flooded basement. The breaker box contains significant electricity for the whole house.
Once the floor is dry and no flood water is touching appliances or outlets, if possible, unplug or shut off all flooded equipment before electricity is restored.
“If it can be done safely, homeowners can turn off air conditioners or major appliances that may have been running when the outage occurred,” says Paul. “This will help avoid a sudden surge of power when electric service is restored.”
If your power is “on” after a flood event
There is a possibility of electric shock or electric short circuit, which can cause a fire. If the electric panel was affected by flooding, it must be inspected by a municipal inspector. Then it must be repaired, re-inspected, and turned on before gas service can be restored. (Municipal inspection rules vary so check with your town for precise instructions.)
“The key item is floodwater must be cleared before that inspection is performed,” says Paul. “Municipal employees will not perform this service if floodwater is still on the floor.”
If power is “off” after a flood event
The electric panel must be inspected by a municipal inspector before the power is restored. Once again, floodwater must be cleared for that inspection before gas service can be restored.
“We try to make it clear to customers that all electric issues have to be removed before we can consider introducing gas back to the home,” says Paul.
How to clear floodwater
How do you begin to deal with this?
Since floodwater needs to be cleared in order to get service reconnected, how does a homeowner get the water out of their home?
“Sometimes the municipality, including the fire department and others, can help,” says Paul, “but homeowners have to be careful. If they take too much floodwater out, it can affect the foundation of the home.”
Some experts suggest pumping out a third of the floodwater each day for three days.
“If there’s water outside the home and inside – if there’s an inequality of pressures, the foundation can collapse,” warns Paul. “Also, just floodwater itself can affect the foundation.”
Appliance safety after a flood
Appliances do not tread water well.
Appliances that have been exposed to water can short out and become a fire hazard. A trained service professional can determine how high the water level mark reached and identify any specific appliance hazards.
“Rusting of ground connections and pitting of wiring harnesses and connections can cause exposure to electric shock and malfunctioning of the appliance,” says Paul.
You should replace your appliances or have them inspected before attempting to use them. Contact your the manufacturer(s) of your appliances for inspection and further instructions.
Listening to professionals is important as even appliances that work now can create hazardous situations in the future.
“Heating controls exposed to floodwater can fail even though they tested OK after being dried and placed back in operation,” says Paul. “This is especially true for electromechanical components that may short out or fail after internal corrosion develops.”
That’s why any controls exposed to floodwater must always be replaced.
Beware of mold.
All newer appliances contain circuit boards and electrical components that get damaged easily by coming in contact with floodwater. They would need replacement if flooded or exposed to surges.
Gas-fire equipment contains safety controls that, after being exposed to floodwater, can potentially create an overheating or fire condition.
“PSE&G will not restore gas to water heaters with controls that have been affected by floodwater,” says Paul. “Flooded units must be replaced, and every water heater manufacturer makes this point.”
Since the 90’s, the technology of water heaters has changed, and now all components are together tied to the gas valve.
“There’s really no way of resurrecting it,” says Paul.
Anything that came in contact with floodwater may have also been exposed to stored chemicals, raw sewage, and other unknown contaminants. Mold can grow on any surface that was exposed to floodwater.
“Homeowners should also be aware of health-related risks that are associated with floodwater,” says Paul. “If a refrigerator is off and has been affected by flooding, there’s a possibility of getting mold inside the refrigerator and freezer. In that case, the homeowners may not want to use that again.”
PSE&G provides customers with detailed guidance on how to deal with flooding or other safety related emergencies at www.pseg.com
A better way to manage your home
Download the app now!
Homeownership can be hard, but it doesn’t have to be. vipHome.app can help. In less than four minutes, you can be introduced to a new way to home. Simply download the app, register your home, and enjoy a simplified homeownership experience.
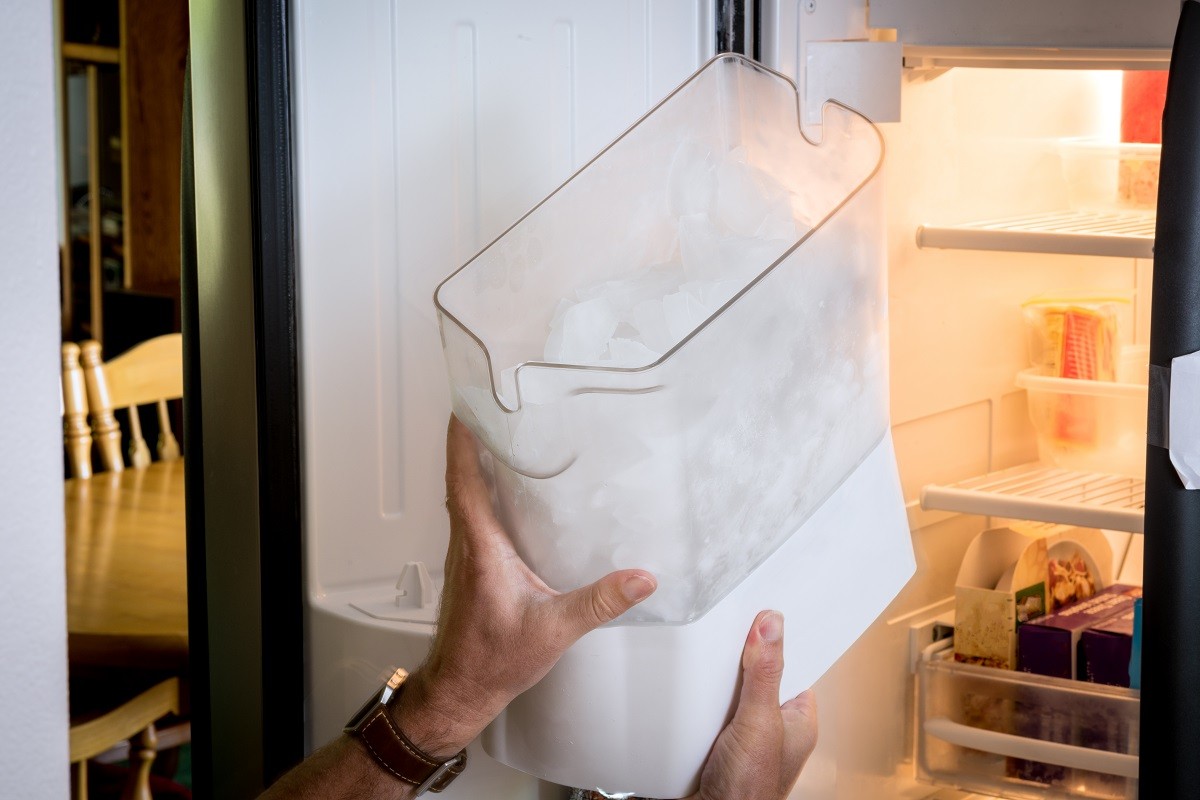
As summer is right around the bend, you’ll want to make sure that your ice maker is in prime condition – for drinks, for cooling off, or for keeping food cold. That’s why we put together this blog to address some common problems with ice makers and help you prevent them with some quick maintenance tips!
What causes an ice maker to freeze up?
You may have a frozen inlet tube.
Most likely, you’ve got a frozen inlet tube. This tube supplies water to your ice maker. If you suspect this is the case, you’ll have to thaw out the tube. You’ll need to:
Unplug your refrigerator.
Remove your ice maker and inspect the tube.
Use a small funnel and warm water to thaw the tube or disconnect the tube and thaw in the sink.
Check with the manufacturer’s instructions for the safest way to thaw out your unit’s tube.
Check the temperature of your freezer.
If the inlet tube isn’t frozen, then the next step is to check the water filter or freezer temperature. You may need to replace the water filter, and if your freezer is actually too cold, try raising the temperature. (The freezer needs to be between zero and eight degrees to make ice.) Don’t raise the dial too high! While that might thaw out a frozen inlet tube, it can also cause your food to thaw.
If you have hard water in your home, a clogged water inlet valve could also lead to a flood and subsequent freeze up of your ice maker. You’ll need to clean out the sediment and minerals by removing the valve in the back of your refrigerator (you’ll need a screwdriver and a wrench), and then washing the screen inside the valve with warm, soapy water.
Just remember to always check the manufacturer’s instructions and unplug the refrigerator before performing any maintenance or repairs. If need be, you might need to disconnect the water supply line to your refrigerator, so have a towel ready!
Why isn’t my ice maker producing ice?
Missing something important?
Check the mechanical parts first. Is the feeder arm working properly? Does your maker have an on-off switch that’s flipped to off? Are there any crimps in the water line that may have stopped the water flowing? Make sure everything is working as it should be.
Then check that the temperature is low enough to make ice. Fill an ice cube tray with water and place it in the freezer. Check back in a few hours. If you have ice, then check that water is making it to the ice machine.
The water filter may be clogged with sediment, especially if your home has hard water. Depending upon your refrigerator make and model, this can be super easy DIY project! Just make sure to order the correct part by checking the serial number and model number inside the unit.
If you haven’t found the problem yet, touch the bottom of your ice maker. If it feels warm, then your freezer’s heater – that’s a real thing! – may be malfunctioning. Call an appliance technician to fix the heater, though you may need to replace the ice maker.
Why does my ice smell or taste funky?
Does your ice smell bad?
This probably means you haven’t cleaned out your refrigerator in a while, and there’s spoiled or foul-smelling food that is influencing your ice. Make sure to clean your refrigerator periodically to prevent this issue.
Every few months, throw away any ice, then wash and dry the bin. (Make sure to unplug the refrigerator whenever you are cleaning it.) At least every six months, give your ice maker a thorough cleaning. (You might have to do this more than twice a year if you have hard water.)
What does cleaning and sanitizing my ice machine entail?
Sanitize your machine with a bleach and water solution.
Every ice maker has a different set of instructions and warnings, so before you do start the cleaning process, read the manual online. (Most manuals are on the manufacturer’s website.)
Here are the general steps to cleaning your refrigerator ice maker:
Turn off your ice maker and unplug your refrigerator.
Take out the bin and dump the contains into the sink.
Wash the bin with soap and warm water, removing any ice stuck to it.
Sanitize the bin with either vinegar and water solution or a bleach and water formula. (You can also use a cleaning solution.) Dry completely before reinstalling.
Examine the ice maker to make sure there’s no ice particles stuck inside. With the bin removed, clean the hardware you can reach with a clean cloth and a sanitizing liquid. Dry completely.
Check your water filter. Replace if necessary.
Once everything is dry, place the removed parts back into the unit. Replug the refrigerator and restart the ice maker. Dispose of the first few servings as they may have some remnants of a soap or vinegar taste.
Perform this much needed ice maker maintenance at least twice a year, more often if you start getting discolored or foul-tasting ice.
If you’re unsure how to fix an ice maker in your freezer, always call a professional.
Stay on top of home maintenance
Homeownership can be hard, but it doesn’t have to be. vipHome.app can help. In less than four minutes, you can be introduced to a new way to home. Simply download the app, register your home, and enjoy a simplified homeownership experience.
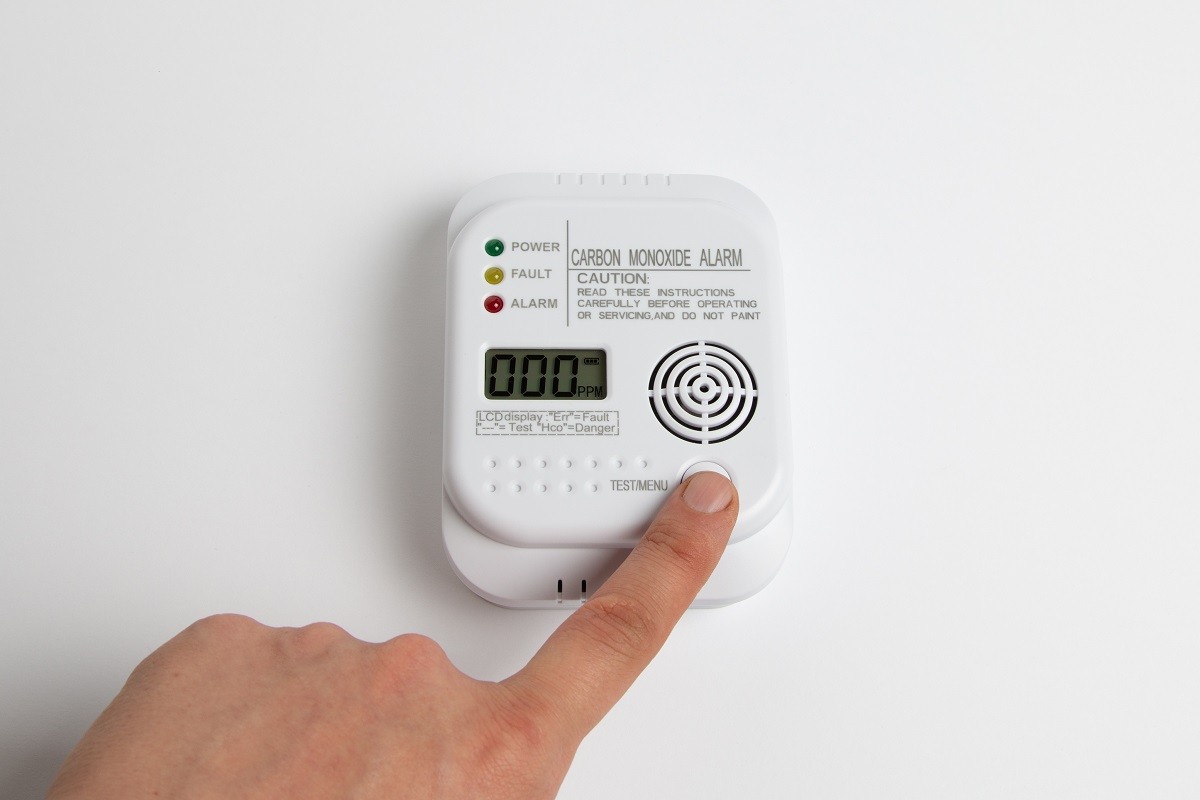
What you can’t see, can’t hurt you – doesn’t apply to carbon monoxide (CO). Sometimes called the “invisible killer,” CO gas cannot be seen, tasted, or smelled, but it can be deadly.
To help you prevent a deadly build of CO in your home, we tackled nine FAQ about detecting and preventing CO with the help of theNational Fire Protection Association(NFPA)!
What causes carbon monoxide in a home?
Never run vehicles inside a garage.
CO is created when fossil fuels such as kerosene, gasoline, coal, natural gas, propane, methane, or wood don’t burn completely. CO poisoning can result from gas-, gasoline-, and diesel-fueled vehicles idling inside garages or from malfunctioning or improperly vented water heaters, clothes dryers, furnaces and other heating appliances, and portable generators.
Remember, people die when they are exposed to dangerous levels of carbon monoxide.
How can you prevent carbon monoxide poisoning?
Install and test carbon monoxide detectors.
By maintaining your home and following these safe homeowning practices, you can help to prevent a dangerous buildup of CO in your home.
Have gas appliances, fuel-burning heating equipment, and chimneys inspected per the manufacturer’s instructions.
Before using the fireplace, open the damper for proper ventilation. When finished, leave the damper open until the fire is completely extinguished to prevent smoke and gases generated by embers from entering the home.
Never use an oven or stovetop to heat your home.
Purchase heating and cooking equipment that is listed by a qualified testing laboratory.
Vent the exhaust from fuel-burning equipment to the outside. Keep the venting clear and unblocked.
Never run a vehicle or other fueled engine or motor in a garage, even if the garage doors are open.
If your vehicle has an automatic engine starter, check to make sure your vehicle is off if it is in the garage.
Make sure vents for the dryer, furnace, stove, and fireplace are clear of snow and other debris.
Always use barbecue grills outside, away from all doors, windows, vents, and other building openings. Never use grills inside the home or the garage, even if the doors are open.
Use portable generators outdoorsin well-ventilated areas at least 20 feet from all doors, windows, and vent openings. Measure the 20-foot distance from the generator to the building. Never use a generator in an attached garage, even with the door open.
Place generators so that exhaust fumes cannot enter the home through windows, doors, or other openings in the building. The exhaust must be directed away from the building.
Can you smell carbon monoxide?
Get out and call 911.
Unfortunately, no, it’s an odorless, invisible gas. That’s why if your carbon monoxide detector ever goes off, you should get out of your home and call 911 or the emergency number for your community. Your alarm may be the only reason you know there is a CO buildup in your home.
Can opening a window stop carbon monoxide poisoning?
Opening a window can introduce fresh air into a home, but it will not stop carbon monoxide buildup or prevent sickness or death.
What do you do if your CO alarm sounds?
Immediately move to a fresh air location outdoors. Make sure everyone is accounted for. Call 9-1-1 or the fire department from outside. Remain there until emergency responders deem it safe to reenter the home.
What is the best precaution against carbon monoxide poisoning?
While completing necessary home maintenance is one of the best precautions against CO poisoning, installing, maintaining, and testing your carbon monoxide alarms is the best way to make sure you’re alerted in the event of a CO buildup.
Where should carbon monoxide alarms be placed?
Consider interconnected alarms.
Install and maintain CO alarms outside each separate sleeping area, on every level of the home, and in other locations as required by local codes requirements. Before installing, make sure to read and follow the manufacturer’s instructions for placement and mounting height.
For the best protection, have CO alarms that are interconnected throughout the home. When one sounds, they all sound.
No matter what type of alarms you get, choose alarms that are listed by a qualified testing laboratory.
When traveling or staying away from home, bring a travel carbon monoxide (CO) alarm.
Do smoke alarms detect carbon monoxide?
No.Carbon monoxide (CO) alarms are not substitutes for smoke alarms and vice versa. Know the difference between the sound of smoke alarms and the sound of CO alarms.
How long do carbon monoxide detectors last?
The sensors in CO alarms have a limited life, so replace the CO alarm according to manufacturer’s instructions or when the end-of-life signal sounds. Remember to test your CO alarms at least once a month and replace them if they fail to respond. (Press the test button on the front or side of the alarm.)
To keep CO alarms working, follow manufacturer’s instructions for cleaning. The instructions are included in the package or can be found on the internet.
What does carbon monoxide poisoning feel like?
Symptoms of carbon monoxide poisoning generally include headache, nausea or vomiting, dizziness, confusion, shortness of breath, blurred vision, drowsiness, and loss of consciousness. Many of these symptoms are also common with colds, viruses, and stomach bugs, so without a working CO alarm, there’s no way to know if what you’re experiencing is CO poisoning. That’s why it’s imperative you install, maintain, and test your alarms.
Your dirty dryer is more dangerous than it looks. Each year, more than 2,900 clothes dryer fires lead to an average of 5 deaths, 100 injuries, and more than $35 million in property loss.
As if the fear of a home fire wasn’t enough, a dirty dryer vent can increase your gas or electricity costs and damage your dryer’s heating element (as well as your favorite pair of jeans).
So keep your home intact and your clothes smelling springtime fresh with this quick guide to dryer vent cleaning!
How do you know you need to clean out your dryer?
There are a few surefire ways you know it’s time to clean your dryer. Some red flags include:
A longer drying time than usual.
Lint everywhere – on your clothes, around the doorway, behind your dyer.
An overheating dryer that shuts off regularly.
A moldy smell on your clothes and in your dryer.
Hotter than usual clothes or dryer at the end of a normal drying cycle.
A lack of lint or lint on the wrong side of the filter.
A burning smell in the laundry room.
Pet hair on clothing after a drying cycle (if you have a pet).
Optimally, once a year. However, if you notice any warning signs, you might need to clean the unit more frequently (or do a deeper clean).
If you keep forgetting to clean your clogged dryer vent, the vipHome.app can help! We’ll send you personalized reminders for home maintenance and tailored recommendations for home improvement right to your phone. As a member, you’ll receive a reminder to clean out your dryer vent the same time next year!
How much does a dryer vent cleaning cost?
According to HomeAdvisor, a typical dryer cleaning will cost between $100 – $169, with an average of $132. High-end job can run as much as $300 – if your dryer is located far from an exterior wall.
What if you want to tackle a DIY dryer vent cleaning?
Give your appliances some attention.
Typically, a DIY dryer vent cleaning is an easy home maintenance project. In fact, your local home improvement store sells dryer vent cleaning kits and brushes to make the job easier.
We do urge you to hire a dryer vent cleaning professional if you’re not familiar with your unit, and never clean your vent if you have a rooftop vent. Safety first!
But if you’re ready to tackle this home project –
Here’s a quick step-by-step guide!
Take care of your home – like it always takes care of you.
First, gather your tools for the project: a screwdriver, a vacuum, an extendable flexible brush, and a broom. If you brought a vent cleaning kit with a hose attachment, grab that now, too.
Second, find the vent (it should be on the back of your dryer) and the exhaust vent (where the dryer vent exits your home).
Next, unplug the dryer (make sure it’s off first), and if you’re working with a gas dryer, turn off the valve.
Then, move the dryer away from the wall and disconnect the dryer duct. (Use the screwdriver to loosen the hose clamp if need be.)
Now, remove the dryer lint. You can do this by hand (with proper safety gloves), but you’ll also need to use a vacuum (or shop vac) to capture the lint you can’t reach.
You can also detach the vent where it meets the wall, and don’t forget to head outside. There, you’ll need to detach the vent cover and vacuum the excess lint. Be aware that rodents and birds like to use lint to form nests, so you might end up finding more than just lint.
Rotate your dryer vent cleaning brush inside the vent and/or duct to remove as much lint as possible. Do a thorough job, or you’ll need to do this again in a few months or even create a fire hazard.
Clean around the dryer’s floor and wall to remove remnants. If you leave any lint around the back of the dryer, it’ll be sucked back inside the dryer once you restart it.
When cleaning is complete, check for any damage to ducts. If the duct looks in good condition, reconnect.
Move the dryer back into place, then plug in the dryer, and if need be, turn the gas back on.
Test-run an air fluff cycle to check that the dryer is functioning properly and clear any residual matter.
And you’re done! Congratulations on finishing another DIY home project!
Stop lint in the first place
Don’t let your dryer get like this.
While you’ll still need to complete this home project yearly, you’ll want to stop lint buildup in the first place. This will not only make your cleanup job easier; it’ll also up your efficiency, keep your utility bills low, and prolong the life of your unit.
So don’t forget to complete the following maintenance tasks regularly:
Clean your lint trap after every cycle.
Clean your filters to the point where water can easily flow through.
Sweep the area around your dryer.
Remove the lint trap and vacuum around the area on a weekly or monthly basis (depending upon how often you use your dryer).
Stay on top of home maintenance
Download the app today!
Homeownership can be hard, but it doesn’t have to be. The vipHome.app can help. In less than four minutes, enjoy a new way to manage your home. Simply download the app, register your home, and enjoy a simplified homeownership experience.