fbpx

Category: Water + Plumbing

a hot water handle on a bathtub

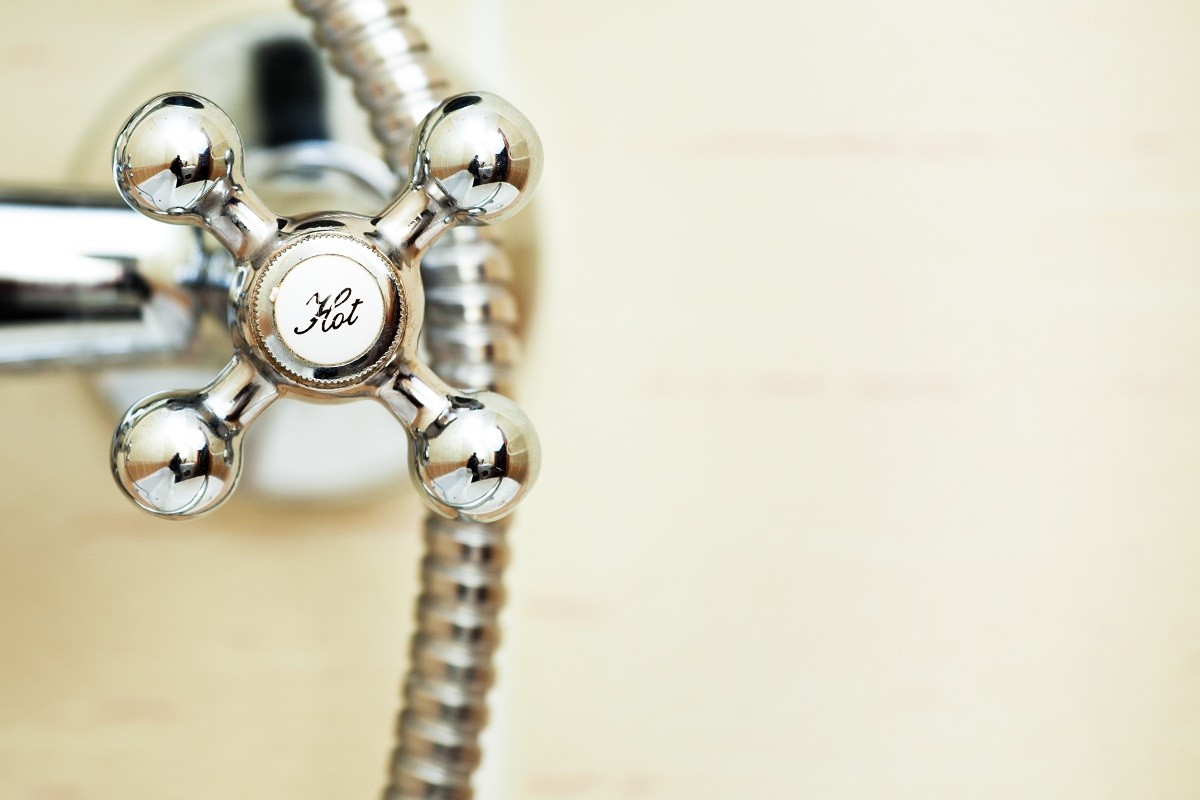
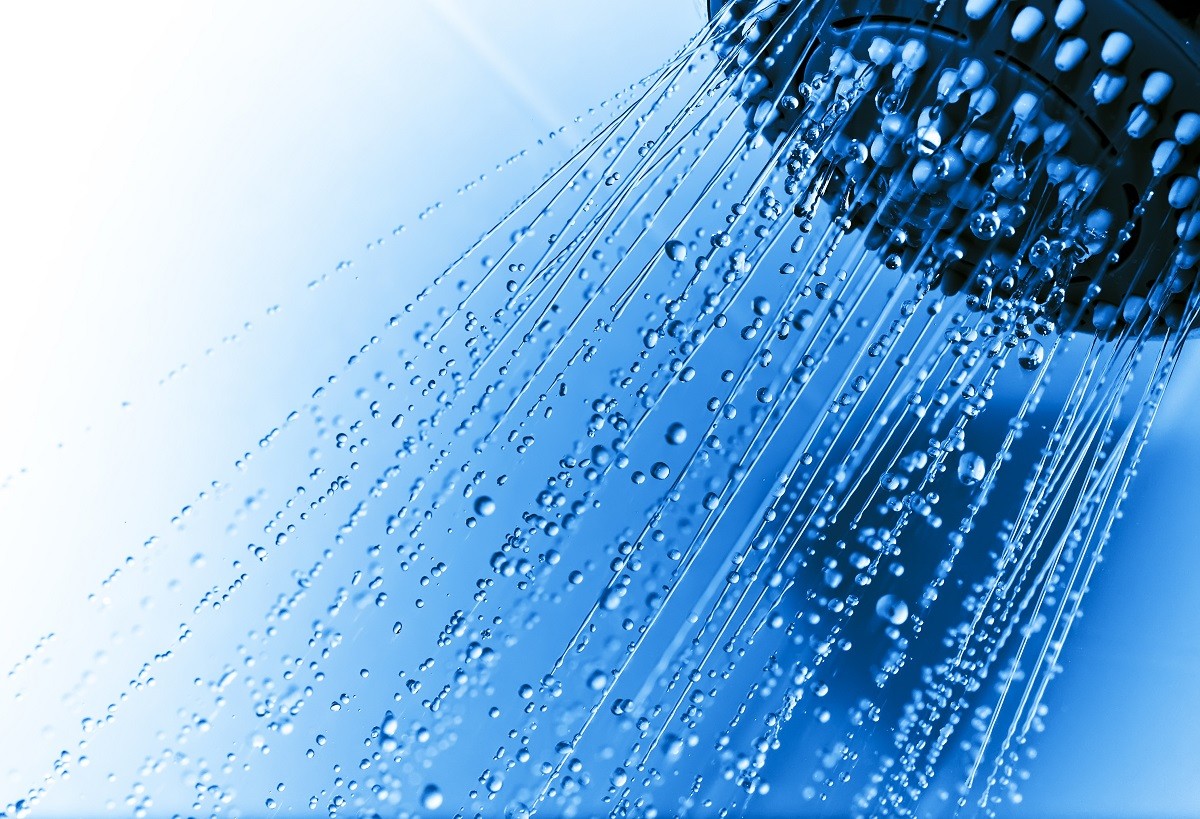
7 Super Easy Steps to Flushing Your Hot Water Heater

Buildup, sediment, and corrosion – these words should strike fear into the heart of every homeowner. These items can cause your hot water heater to leak, stop working, or even explode.

To find out how to save your hot water heater (and your warm showers), read on! 

Should I flush my hot water heater?

Ideally, you should flush your hot water heater at least once a year. The reason why is – minerals and debris from your water can actually build in your hot water heater and create clogs. These clogs can cause the unit to work inefficiently, malfunction, or stop working. Say bye-bye to those relaxing, hot baths and hello to higher energy bills!

A puddle underneath a water heater
Leaks can happen when you don’t take care of your water heater!

Before you head down to your basement or utility closet, first check to see if your hot water heater has been flushed or drained in the last five years or if the hot water heater is younger than five years old. (The vipHome.app keeps all your home info in one place, including the age of your hot water heater!) 

If you said yes to either of the above items, then you should absolutely flush your hot water heater. You should also continue to flush it out annually, so your unit lasts longer. 

However, if you’ve never flushed your hot water heater (Boo!) or it’s more than five years old, then check with your professional plumber. All the sediment buildup can actually cause more damage if you try to remove it. 

How to flush a hot water heater

Every hot water heater is a bit different, so consult the manufacturer’s instructions before completing any maintenance. Our experts put together a general step-by-step guide that can help with a gas or electric heater. If you have a tankless water heater, make sure to contact a professional plumber

Also, if you are at all uncomfortable, always call a professional to complete home maintenance. 

1. Turn off the water supply. 

red switches or water valves on a hot water heater
Look for switches such as this.

You should be able to do this on the unit itself or from the shut-off valve on the water main running into your home.

2. Turn off the heat source to your water heater. 

This step will help to prevent damage to the unit’s heating element. Your owner’s manual will tell you the best way to turn off the unit’s heat source, but if you have an electric hot water heater, you may be able to turn it off from the breaker box. If you have a gas hot water heater, there may actually be a setting for this step. When in doubt, always consult a professional plumber.

3. Allow your water heater to cool. 

If you don’t, you could get scalded or burned. The cooling process can take a few hours, but you can speed it up by washing clothes in hot water or taking a longer-than-average shower. 

4. Attach a garden hose to the drain valve.

an appliance expert inspecting a hot water heater
Place a rag under the connection point (to catch any drips).

Make sure you have the hose flowing into a bucket, a drain, or even outside. Absolutely, under no circumstances, should you drain the hot water heater into your sump pump basin. The sediment can clog your sump pump mechanics and cause even more issues!

5. Turn on the hot water in a nearby sink. 

This helps to prevent a vacuum from forming in your pipes and allows the water to flow out of your tank. Some experts suggest you turn on a faucet on the level above the hot water heater. 

Also, grab a rag. No doubt, water will spill somewhere! 

6. Slowly and carefully open the drain valve. 

Hot water heater drain valve
Be careful as the water might still be hot!

Let all the water drain out of the unit, and then close the drain valve. Turn the water to the unit back on and fill the tank once more. This should lift any sediment off the bottom. Turn off the water and drain your water heater again. 

Repeat the fill and drain process until the water runs clear.

7. Clean up your tools and turn on the unit. 

Close the drain valve, remove the hose, and once more turn on the water to the unit. Then, refill the tank and turn back on the heat source to your water heater.

You should also turn on the hot water in a nearby sink to allow all the air to come out of the system. The water will come out in spurts to begin. Don’t worry! That’s normal. 

How often should I flush my water heater?

It is recommended that you flush your water heater at least once a year. (Make sure to check “Should I flush my hot water heater?” above!) If you have hard water, you might want to flush your hot water heater every six months or even install a water softener. 

A professional can also complete this task during your annual plumbing inspection. (You schedule that every year, right?) 

Want more step-by-step guides? Check out the vipTips, expert tips from sources like FEMA, the Department of Energy, and more in the vipHome.app!

Take care of your largest investment – your home!

A cell phone showing the vipHomeLink dashboard with the Home Fitness Index
Download the app today!

Homeownership can be hard, but it doesn’t have to be. The vipHome.app can help. In less than four minutes, enjoy a new way to manage your home. Simply download the app, register your home, and enjoy a simplified homeownership experience.

Download the app today!

Google Play buttonApp Store button

Learn More

vipHomeLink-toilet-overview

A Super Quick Guide to Replacing Your Toilet’s Water Fill Valve

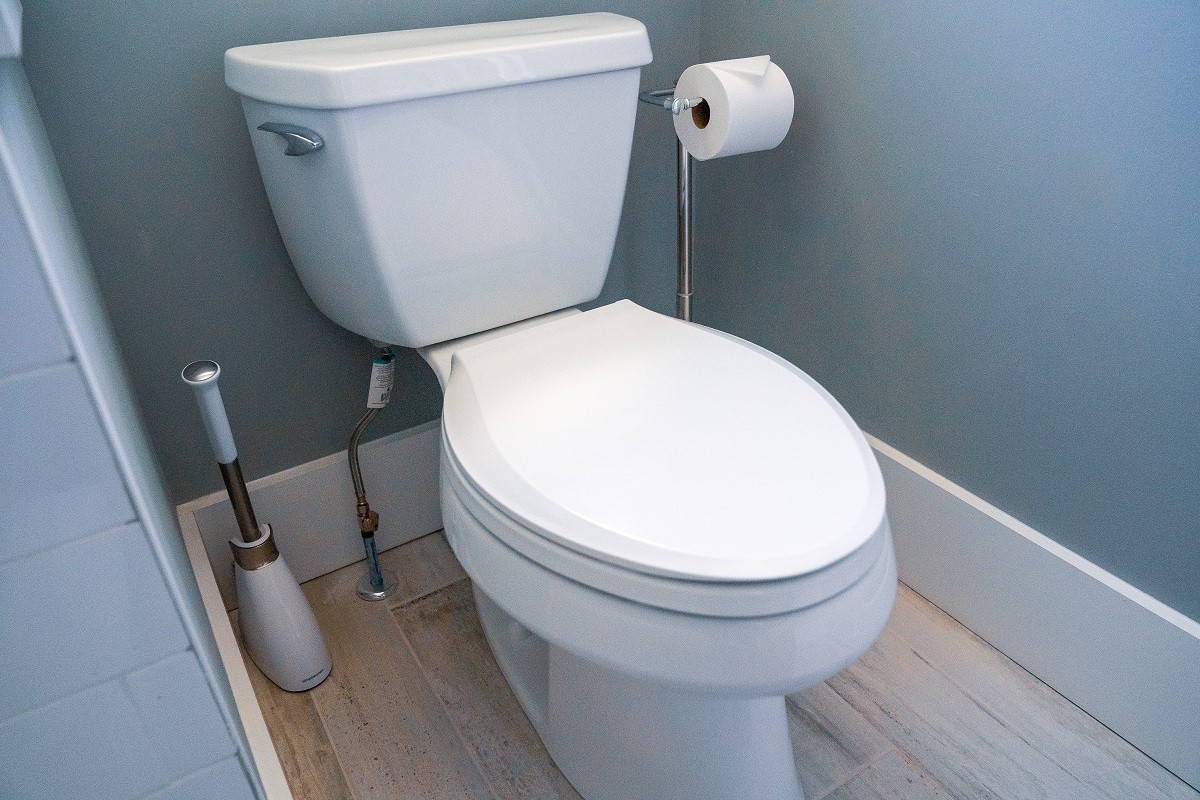
One of the most frightening noises in your bathroom is the sound of your toilet not filling properly. Depending upon your comfort level with diy projects, you might decide to call a plumber, but here at vipHomeLink, we believe you can fix this issue.

First, we’re going to tell you how to clean the valve, and if that doesn’t work, we’re going to help you replace the water valve assembly in your toilet tank. (Go you!)

(Please note: Our Digital Content Manager Susie (me!) cleaned and later replaced the Kohler Genuine Part GP1083167 using the silent fill valve kit. When completing a toilet water valve replacement with other toilets and/or parts, some steps may differ, but this guide should give you an overview of the process.)

Step 1: Take off the toilet cover

the cover of a toilet is off and laying on the seat
Start by assessing the situation.

Look inside the tank. Depending on your type of toilet, you may see two pipes (the valve assembly and the overflow pipe).

What you need to inspect is the valve assembly on the left-hand side of the tank. It might appear to have a red or gray cap. If water is flowing out the top of the cap, this is a problem.

Step 2: Clean the valve assembly

vinegar and a glass on the back of a toilet
Clean the assembly of any materials with the help of vinegar.

If you have hard water, you might have some sediment stuck in the valve. Clean the valve with these quick steps:

  • Grab two plastic cups, one filled with vinegar.
  • Turn off the water to your toilet. (Toilets have shut off valves on the side. Turn the knob counterclockwise or flip downward.)
a person shuts off the water main to the toilet
Don’t forget to shut off the water to the tank.
  • Start by taking off the cover and flushing the toilet.
  • Press down on the valve assembly cap (like a pill bottle) and turn counterclockwise to release.
  • Take the washer off the bottom of the cap and place it in the cup with vinegar. Let it sit for a few minutes to wash away any mineral buildup.
  • Then place a different cup upside down over the open valve and turn the water back on. Be careful! Water will forcibly shoot up and into the cup. Allow the water to run for 30 seconds, and then shut off the water again.
  • Once the washer has soaked, place it back into position under the cap. Press down again, and this time, turn the cap clockwise.
  • Turn back on the water.

If the toilet tank fills normally, way to go! You fixed the issue! But if the valve continues to spew water from under the cap, you’ll need to replace the valve assembly.

Step 3: Order the correct part

a sticker in a tank with the number of the toilet parts
Check the sticker in your tank for the part number.

On most toilets, you’ll find the type of valve assembly on a sticker on the wall of the tank. If you’re like me, then you might not know what all those numbers mean.

Instead, get the numbers off the top of the valve’s cap and insert them into a Google search. Your toilet’s valve assembly should show up in the results with the serial number. Compare that number to the ones on the tank sticker to find the correct part.

Order. Ours cost less than $20 and arrived less than a week later, but you can also pick one up at a local hardware store.

(Once you know the specific part, you can add the serial number to the Notes section of the vipHome.app!)

Step 4: Replace the valve assembly

Easier said than done – we know, but this is a relatively easy task that shouldn’t take more than 15 minutes. You’ll need a bucket, a garbage bag, an adjustable wrench, and a plastic cup. (If you don’t have a bucket, then grab a towel you can throw away or bleach.)

  • First, lay a garbage bag down under the valve’s opening and put a bucket on top of it. If you don’t have a bucket, lay down your worst towel.
a bucket and garbage bag next to a toilet
Protect your floor and walls from water damage.

(Water damage is a bigger expense than the toilet part and can lead to more issues, like mold growth.)

  • Turn off the water to the toilet again, flush, and use the plastic cup to scoop out as much of the excess water as you can.
  • Disconnect the water supply line that leads into the tank.
a plumber disconnects a water line from the toilet
Disconnect the water line under the toilet tank.
  • Inside the tank, wiggle the overflow tube free from the valve.
  • Unscrew the plastic lock nut, which holds the valve’s pipe to the tank. You may need to use an adjustable wrench.
  • Lift the valve assembly from the tank (and watch as water from the tank falls into your bucket or onto the towel). Take note of the color of the connector on the side of the valve.
  • Next, attach the corresponding connector to the assembly. (Your replacement kit should come with a few different color connectors. If your old valve had a red connector, use a red connector.)
  • Measure the new base against the old base. If the length of the new one is shorter, unscrew the lock ring in the middle and give the valve bottom a swift tug to adjust the height. Re-tighten the ring.
  • Insert the valve into the hole in the bottom of the tank and tighten the nut on the outside. Use the wrench to tighten the lock nut a quarter turn.
  • Reconnect the water hose outside the tank. Tighten the metal washer.
the toilet tank with a water valve
Reconnect the tube inside the tank. (It should look like this.)
  • Reconnect the overflow tube in the tank.
  • Turn back on the water at the shutoff valve. The tank should refill normally.
A close-up on the handle to flush the tank
Is your tank refilling properly?
  • If the water levels aren’t the same (you can tell from the lines on the side of the tank), then you’ll need to adjust the adjustment clip or screw that maintains the level of the float cup.
  • Replace the toilet’s cover.

Congrats! You’ve now replaced the water valve assembly. If you had any difficulties during this process, contact a professional plumber.

Looking for more home maintenance advice?

A cell phone showing the vipHomeLink dashboard with the Home Fitness Index
Download the app today!

Homeownership can be hard, but it doesn’t have to be. The vipHome.app can help. In less than four minutes, enjoy a new way to manage your home. Simply download the app, register your home, and enjoy a simplified homeownership experience.

Get it today!

Learn More

To,Fill,A,Glass,Jug,With,Tap,Water,At,The

Well, Well, Well – What Do You Need to Know about Well Water Safety?

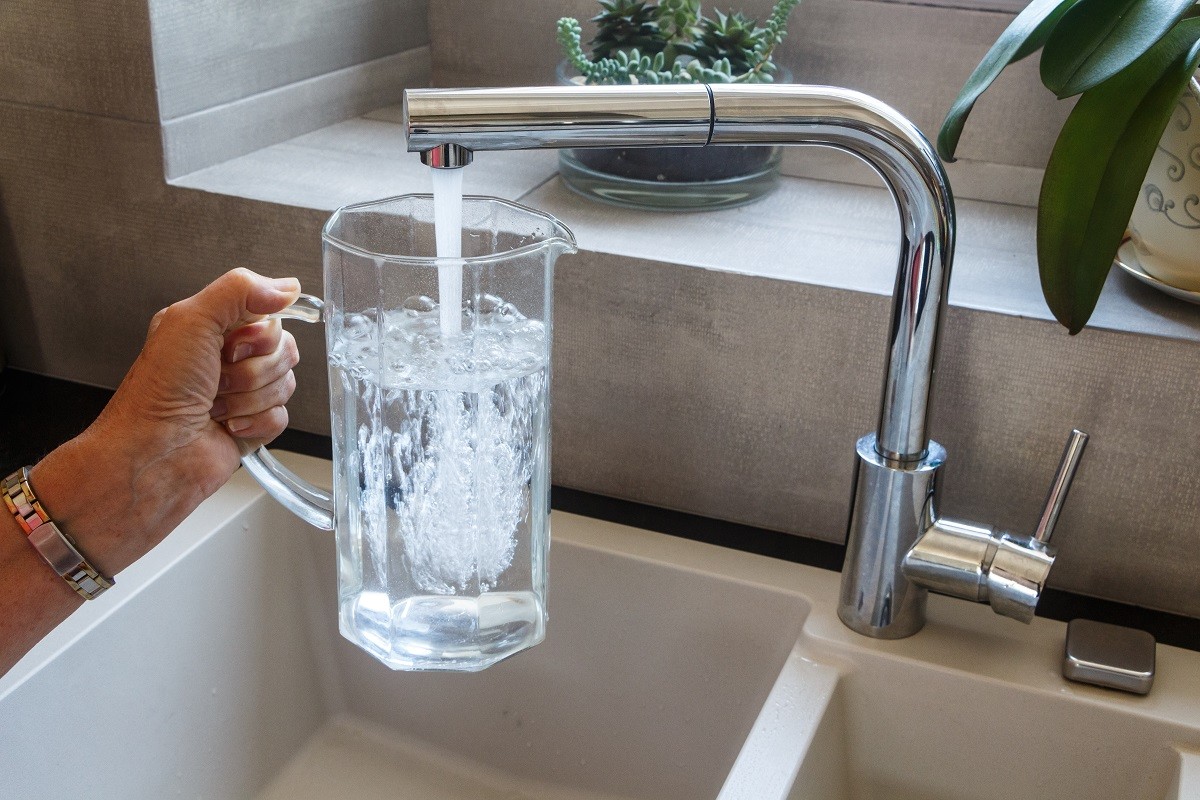
According to the U.S. Geological Survey, more than 43 million people – or 15 million homes – rely upon private household wells for drinking water, but is well water safe to drink?

“There can be serious water quality problems with well water,” says Eric Yeggy, Technical Affairs Director for the Water Quality Association. “I wouldn’t rely on chance when it’s relatively easy to find out if your well water is safe to drink.”

Eric has spent more than 20 years in the environmental testing industry analyzing drinking water, ground water, and soil, and recently stopped by the vipHome Podcast with well water safety tips!

Common contaminants of well water

Well water is essentially water pulled up from the ground (or groundwater) that is untreated. Common contaminants in well water include arsenic and nitrate as well as radiological contaminants like radium, barium, strontium. Groundwater can also be impacted by industrial activity.

“Even well-intentioned human activities sometimes have unintended consequences,” says Eric.

Recently, PFAS contamination has been in the news (and Eric explained PFAS chemicals to us on an earlier episode of the vipHome Podcast)! PFAS are per- and poly-fluorinated alkyl substances that are commonly used in firefighting foams, and one of the ways they are released into the environment is through events that were staged to train firefighters.

Firefighter squirting foam out of the hose

PFAS chemicals can get into your water from common occurrences.

“Once they are released in the environment, they’re very persistent and can find their way into aquifers,” says Eric.

Other contaminants can enter aquifers, such as pesticides and herbicides, from agricultural activities. Nitrate or nitrate from fertilizers or from livestock manure can also reach dangerous levels in aquifers, especially for small infants. Fecal matter, too, can threaten the safety of water well.

“The presence of fecal coliform or E. coli is an indication that fecal matter is somehow making it into your well water,” says Eric. “You might be exposed to pathogenic bacteria, viruses, or even cysts like cryptosporidium.”

Warning signs of a contaminated or polluted well

Trust your senses. Discoloration, bad taste, or odor are all indications that something might be wrong with your private well water.

“It’s worthwhile to do some testing if you are noticing any of that,” says Eric.

White scale buildup (or mineral buildup) on your faucets and shower doors indicates hard water, which is not dangerous to humans but can damage your appliances.

iron stains around the drain

Does your sink look like this?

Iron can cause a reddish staining, and manganese can cause a black staining. Manganese is not dangerous at lower levels but can cause serious health effects at higher levels, including problems with memory, attention, and motor skills. Children can also develop learning and behavior problems from manganese exposure.

Unfortunately, “…many things that could potentially impact your health or the health of your family are completely tasteless and odorless, like arsenic,” says Eric. “It’s a naturally occurring element that is common in the geology and is often picked up by the groundwater.”

How to test your well water

“If you are a do-it-yourselfer, the first thing I would recommend is to contact your state or your county public health department,” says Eric.

Oftentimes, county public health departments have programs that will help with well water testing and recommend what to test for based on the history of the other groundwater testing in your area.

“There’s also private laboratories that do this kind of testing,” says Eric. “The Water Quality Association can help you find certified drinking water laboratories and water treatment specialists in your state.”

Testing is essential for water well safety. Learn more tap water testing tips from Eric and the WQA now!

Frequency of well water inspection and testing

Person wearing glove holding a test tube under a faucet

Test before and after a well issue.

The Environmental Protection Agency (EPA) recommends testing your well water once a year. If you’ve found issues with nitrates, pesticides, and fecal coliform in the past from surface runoff, then you may want to retest frequently to make sure you’ve fixed those problems.

“You should also retest after flooding,” says Eric. “If your well head has been underwater, there’s a good chance that your well may have been contaminated.”

How to treat a polluted or contaminated well

well cover open on the lawn

A broken well cap can lead to contamination.

Oftentimes, contamination occurs due to a poorly sealed well or a broken well cap. If your test results find your well polluted or contaminated, you should consult your local public health department or a certified well inspector or specialist. These professionals may recommend you:

  • Disinfect the well to remove germs or microbes.
  • Add filters or other on-site treatment processes.
  • Identify a new water source.
  • Or even dig a new deeper well.

Generally, well specialists use a chemical to disinfect the well, followed by flushing to remove that chemical from the house. After your well is disinfected, there are certified products you can use to remove bacteria, virus, and cyst. You can also install a barrier to prevent these contaminants from returning.

Inside your house, you can install a reverse osmosis system under your kitchen sink to remove arsenic and nitrate from your tap water.

“It will come with a separate faucet that you only use for drinking water or cooking water,” says Eric. “You can also get whole-house systems for these contaminants that will treat all the water coming into your home.”

Certain radiological contaminants are easy to remove from your water supply with a water softener.

man adding salt pellets into a water softener

A water soften can help to remove contaminants.

“You will also get the benefits of softened water, including protection of your appliances, cleaner clothes, less energy usage, preventing the buildup of hard water scale, etc.” says Eric.

Of course, there are also PFAS, pesticides, herbicides, and volatile organic solvents or other industrial chemicals that can show up from leaking underground storage tanks.

“First, find what’s in your water first by testing, and then you can shop around to look for products that are certified to remove those contaminants,” recommends Eric.

Well water is safe to drink after disinfection…right?

After the professional disinfects your well, they need to flush that chemical out of the well and through your plumbing.

“Keep in mind that regardless of who you have complete that disinfection step, make sure that they are using a chemical that has been certified to NSF/ANSI/CAN 60. It’s commonly referred to as Standard 60.”

This standard helps to ensure the safety of chemicals used with drinking water.

“You don’t want somebody dumping household bleach or pool and spa chemicals down your well,” says Eric. “Those chemicals contain other things besides just chlorine.”

Laundry bleach has additives that help with scent, odor, and cleaning, which occur naturally from the manufacturing process. These chemicals aren’t dangerous when they are used as intended.

“Typically, these chemicals have a strong chlorine odor,” says Eric, “so you can tell when they’ve flushed it out. The odor will go away.”

Important well water maintenance tips

Resources from the EPA, the Water Systems Council, and privatewellclass.org provide maintenance tips to help you tackle well water safety.

“If I had a private well, the first thing I would do is contact my county or state public health department to see what programs they offer for well owners,” says Eric.

Many of these agencies have field staff who are qualified to inspect your well and give you personalized recommendations.

well cover next an open well

Inspection is key with well safety.

“Those personalized recommendations are going to be much more valuable than just general tips and guidelines,” says Eric.

To prevent well water contamination, the EPA recommends homeowners take the following general steps:

  • Keep hazardous chemicals out of septic systems and away from your well.
  • Pump and inspect septic systems as recommended by your local health department.
  • Install a sanitary seal and slope the area around the well to drain surface runoff.
  • Hire a certified well driller for any new well construction or modification.

The Water Systems Council also recommends that homeowners take the following steps to inspect their well:

  • Inspect the wellhead several times of year to make sure it’s in good condition with no cracks or other issues that can lead to contamination.
  • Have their well pump, storage tank, pipes and valves, and water flow inspected by a licensed well contractor every five years.
  • Have the well inspected immediately if you have no record of the last well inspection.

A well’s serviceable life is usually more than 20 years. Always make sure to use a licensed well contractor to install a new system and close the old well properly and safely.

Get more water safety tips in Water Treatment for Dummies, a digital free booklet available on the WQA website.

WQA logoKeep your home safe and secure

Two cell phones with pictures of the vipHomeApp on them

Homeownership can be hard, but it doesn’t have to be. The vipHome.app can help. In less than four minutes, enjoy a new way to manage your home. Simply download the app, register your home, and enjoy a simplified homeownership experience.

Download the app today!

Learn More

Woman,Hand,Holds,A,Glass,To,Filing,It,With,Water

Save Your Water: 5 FAQ about PFAS Chemicals in Your Drinking Water

If you’ve been doom-scrolling recently, you may have heard of PFAS. The Environmental Protection Agency (EPA) has issued a warning regarding these “forever” chemicals as they pose serious health risks, even at extremely low levels.

What does that mean for your family and your drinking water?

We reached out to Eric Yeggy, Technical Affairs Director for the Water Quality Association. Eric spent more than 20 years in the environmental testing industry analyzing drinking water, ground water, and soil, and shared with us information you need to know about PFAS chemicals and your drinking water.

What are PFAS chemicals?

PFAS, pronounced PEA-fass, are a class of chemicals known as per and polyfluoroalkyl substances. They are manmade chemicals, meaning they don’t occur naturally, and they are very resilient in the environment.

“No one really knows how many of these chemicals are in use,” says Eric. “The estimates I have heard range from anywhere from 4,000 to upwards of 10,000 different PFAS chemicals in use.”

PFAS are commonly found in the following items:

  • Non-stick coatings.
  • Firefighting foams.
  • Food packaging.
  • Clothing.
  • Carpets.
  • And many others!

Companies voluntarily phased the most common PFAS chemicals – PFOS and PFOA – from the United States market in 2015. That’s why your nonstick frying pans may now read “PFOS-free” or “PFOA-free.”

Studies have linked PFOA and PFOS to serious health effects, such as reproductive problems; damage to the liver, the kidneys, the thyroid, and the immune system; elevated cholesterol; cancers; and developmental issues with babies, including low birth weight.

“Unfortunately, we know the least about the PFAS chemicals the industry switched to around 2015,” says Eric. “They might be less dangerous. They might be more dangerous. We just don’t know yet.”

Why are PFAS called forever chemicals?

eggs sunnyside up in a non-stick pan, which may have PFAS chemicals

PFAS are found in everyday items.

“Once you’re exposed, they remain in your body,” says Eric. “Nothing in nature can destroy them once they enter the environment.”

A long carbon chain saturated with fluorine atoms make up PFAS chemicals and at the end is a functional group.

“That carbon–fluorine bond is one of the strongest bonds in chemistry,” says Eric. “It’s very difficult to destroy.”

Do you need to worry about PFAS in your drinking water?

There’s no way to know how many people have PFAS in their drinking water since there hasn’t been extensive testing. However, the Environmental Working Group estimates that as many as 200 million Americans may have drinking water contaminated with PFAS.

Explains Eric, “PFAS have been found in water supplies in every state, and I suspect we’ve only started to scratch the surface.”

Certain laboratories may be able to test upwards of 50 different PFAS chemicals, but as mentioned earlier, there are thousands of these chemicals in use.

“Until we know what they all are, which is information that is currently tightly guarded as ‘trade secrets,’ the laboratories will not be able to develop test methods to look for them,” says Eric.

PFAS bioaccumulate in the food chain and in our bodies, and as mentioned earlier, once these chemicals enter our bodies, they remain there. Scientists have conducted blood studies to see the reach of PFAS chemicals and uncovered disturbing results.

“We know that every American has been exposed to PFAS,” says Eric. “These chemicals are in our blood. You and I have been bioaccumulating PFAS in our bodies since birth.”

How can you tell if you have PFAS in your drinking water?

a homeowner drinking water which may contain PFAS chemicals at a kitchen table

Is your drinking water safe?

There’s no way to know if water has PFAS without testing as there is no funny smell or color change, and usually, the concentration of PFAS is very small.

“We’re talking about levels that are parts per trillion,” says Eric. “Typically, in the drinking water world, we are looking for contaminants that are in the parts per million range or the parts per billion range, so we’re talking about very small amounts that are dangerous.”

In-home test kits do not capture PFAS, and not all certified drinking water laboratories may be able to test for PFAS.

“It’s a difficult test,” says Eric. “Of those that are capable of and certified for PFAS testing, they may each have a different list of PFAS chemicals that they’re testing for.”

If you’re receiving water from the municipal supply, it’s always a good idea to check the annual water quality report for many different reasons. While the Safe Drinking Water Act does not regulate PFAS chemicals, your municipality may be testing for a select few of them. Homeowners on private wells should contact their county and state public health departments.

“Any of these agencies might have helpful information about PFAS contamination in your area,” says Eric.

How can you remove PFAS from drinking water?

Thankfully, third parties, including the WQA and NFS, have tested and certified in-home drinking water treatment systems that remove PFAS, including water filters.

Bottled water may also be a short-term solution.

“A lot of people say that bottled water is just simply tap water that’s repackaged, but in reality, bottled water, even if they are using a source that is tap water, has been put through an entire treatment train,” Eric says.

Unlike other pollutants, boiling water will not help to rid water of PFAS.

“Boiling the water is for microbial contaminants,” says Eric, “so it will not help with PFAS at all.”

Want to learn more about your drinking water? The WQA offers the free booklet Water Treatment for Dummies, which answers questions about home water treatments, products, and professionals in easy-to-understand terms!

Enjoy a new way to manage your home

Two cell phones with pictures of the vipHomeApp on them

Homeownership can be hard, but it doesn’t have to be. The vipHome.app can help. In less than four minutes, enjoy a new way to manage your home. Simply download the app, register your home, and enjoy a simplified homeownership experience.

Download the app today!

Learn More

Roots,And,Baby,Wipes,From,A,Clogged,Sewer,Drain.,A

Why Your Toilet Is Overflowing with Sewage

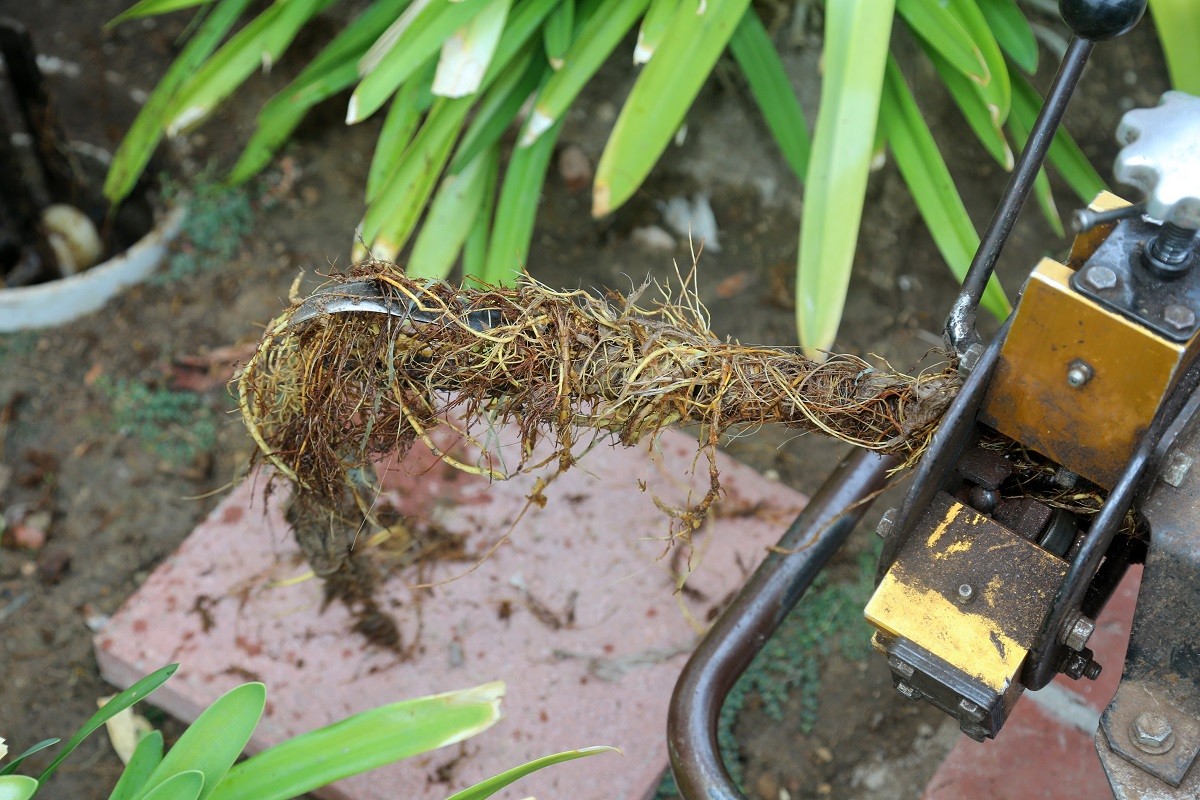
Your toilet bubbles or gurgles, but you think nothing of it. Your home wasn’t built all that long ago, so it’s probably nothing. Unfortunately, a few days later, you walk into your bathroom to find sewage oozing out of your toilet and onto your terracotta tiles from a sewer backup.

Many homeowners have issues with their sewer lines every year, so we reached out to Tom Mahoney of Little Tommy’s Plumbing Shop. Tom has been in the plumbing business since 1989, and his family has been helping Chicago area homeowners to fix their plumbing issues for more than 60 years.

We recently spoke to Tom to find out how to fix a sewer backup issue in your home and even how to prevent it from happening again.

Most common sewer backup causes

While a sewer backup problem can come from paper towels, feminine or hygiene products, the most common cause of a sewer backup comes from outside your home.

“Sewers back up predominantly from root intrusion or tree roots,” says Tom. “Older sewer lines are generally made out of clay, so they’re very porous.”

The roots break through the walls, drink up the water, and start growing. Unfortunately, there are very few warning signs.

“It’s on the rare side that there will be a stagnant smell,” says Tom. “In newer homes, sometimes the toilets will bubble or gurgle, or there’ll be a gurgling sound that the owners hadn’t heard before.”

Most of the time, though, the sewage just begins to seep up through a basement floor drain or toilets in first-floor bathrooms.

water from backed up sewage in the yard

Some homeowners find sewage in their yard!

How to fix a sewer backup problem

What is the process of a sewage backup cleanup?

“You definitely have to call a plumber as soon as possible,” says Tom. “Also, stop running water if at all possible and shut down laundry facilities if they’re running.”

Try to mitigate the damage – clean up what you can (wear gloves and protective equipment!) to keep the hazards (and smell) to a minimum.

Once a licensed plumber arrives, they’ll diagnose the issue – usually by placing a camera into the sewer line – before deciding on a solution.

“It’s usually mechanically routing the sewer out to clear the stoppage,” says Tom, “and that can be from an access in the basement or even from the toilet.”

On rare occasions, Tom and his crew have cleaned out the issue from roof stacks, but the best-case scenario to fix your sewer backup is clearing the pipes from an outside clean-out access. Unfortunately, there have been times when the sewer line itself had to be replaced.

cracked pipe in the dirt

Sometimes the pipe must be replaced.

Explains Tom, “That’s the last thing we have to do or want to do, but that’s usually if the sewers are broken or the root intrusion is so great that you can’t route through.”

Sewer backup FAQs

We asked Tom the questions you may be afraid to ask or didn’t even know you should be asking when it comes to sewer backup issues.

Do homeowners need to leave the home during this time?

“Rarely, but it just depends on if the backup permeates the living area,” says Tom.

How long does it take to correct the issue?

“Most of the time, it’s done after one to two hours, but I’ve also had projects that have taken three days.”

How much does it generally cost to fix a sewer back problem?

“Every project is different but usually $400 to $800.”

Once a sewer back up occurs, what’s the likelihood that it’ll happen again?

“If it’s roots, it’s going to happen again,” says Tom. “We usually try to get our customers on a maintenance schedule where we do it once a year since the roots grow back.”

Tom’s crew has found it’s relatively easy to route out the sewer again, but there are times when the sewer line may need to be repaired.

How can you prevent sewage backup in your house?

Toilet paper and paper towels piled together

Be careful what you flush.

If the issue stemmed from home objects, then sewer backup prevention begins with adopting better discipline and throwing paper towels, flushable wipes, and other products into the garbage.

“My highest recommendation is the only thing that should go through toilets is what it’s meant for – waste and paper,” says Tom. “A lot of the disposable wipes will say they are flushable, but they’re definitely not.”

If the cause of the backup comes from roots, you can avoid planting trees on your property, but that might not stop the issue from occurring.

I pulled out a bushel barrel full of roots from a sewer that didn’t have a tree within a hundred yards,” says Tom.

Don’t forget to call your home insurance company

Couple looking at a tablet

Homeowners insurance shouldn’t be baffling.

Generally, sewer backups are not covered in a standard homeowners insurance policy, so it’s best to talk to your insurance carrier or agent about endorsements or other options. You’ll want to ask, “What does sewer backup insurance cover?” to see if it’s right for you.

Even if you haven’t had an issue with sewer backup before, it’s a good idea to speak with your agent and see if you should add additional insurance coverage, such as water backup insurance, to your current policy.

Stay on top of home maintenance

Two cell phones with viphome app open on the screens

Download the app today!

Homeownership can be hard, but it doesn’t have to be. The vipHome.app can help. In less than four minutes, enjoy a new way to manage your home. Simply download the app, register your home, and enjoy a simplified homeownership experience.

App Store button

Google Play store app

Learn More

Photograph,Of,A,Shower,Head,Showing,Drops,And,Streams,Of

How to Save Your Appliances from the Effects of Hard Water

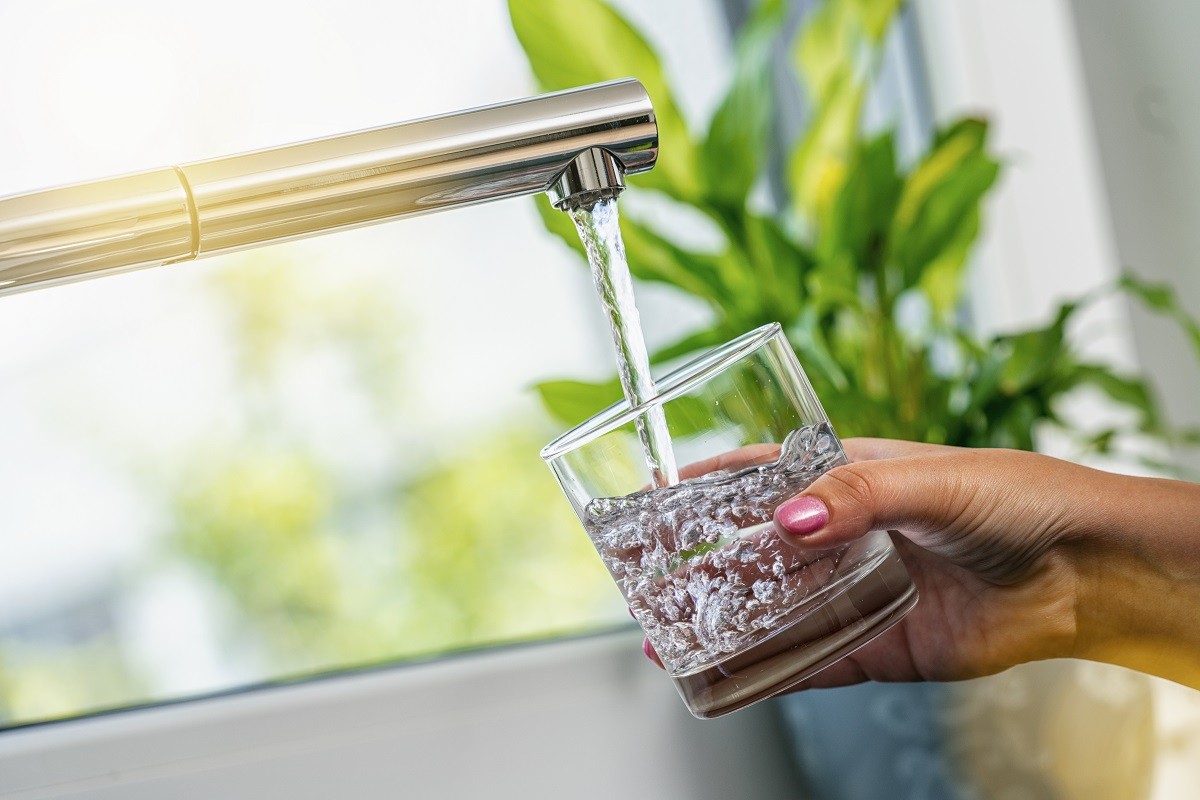
If your water quality test came back showing hard water, it’s not a reason to panic.

“[Hard water] is dangerous to your pipes, your water heater and your appliances,” says Eric Yeggy, Technical Affairs Director for the Water Quality Association. “There’s very good reasons to remove it, but it isn’t going to give you cancer.”

Although it may sound scary, hard water is just water with high mineral content usually in the form of calcium and magnesium.

Thankfully, hard water is safe to drink. Unfortunately, hard water isn’t safe for your fixtures and appliances, so how do you reduce the effects of hard water in your home?

The solution: water softeners

Can hard water ruin a water heater? The answer is yes, but it can ruin much more than that. A study commissioned by the Water Quality Research Foundation and conducted by the Battelle Memorial Institution found that showerheads using hard water lost 75% of their flow rate in 18 months. Faucet strainers clogged in just 19 days.

The same study concluded that hot water heaters using soft water “maintained their original factory efficiency rating for as long as 15 years,” says Eric, “while running hard water through those units cut the efficiency by 48%. The underlying problem here is that a very small amount of scale greatly reduces the efficiency of the heat exchange between a heating element and water.”

A water softener allows water heaters and major appliances to operate at their advertised energy efficiency while also preventing clogs that lower the efficiency of shower heads, faucets, and drains.

a homeowner drinking water which may contain PFAS chemicals at a kitchen table

Water quality can be unique to each home.

Softeners can also be beneficial to the human body by removing some dangerous contaminants from water sources.

“For example, [softeners] will preferentially remove radiological contaminants,” says Eric. “If you have an issue with radiological contaminants because you’re on a deep well, a softener is a great solution to remove those.”

Softening the hard water blow 

Installing a cation exchange water softener is one of the best ways to reduce hardness in home water.

“It removes calcium and magnesium ions, which cause the scale to form,” says Eric. “It replaces them with other ions, typically sodium or potassium.”

By exchanging these ions, instead of simply removing them, the softener prevents the formation of scale. It also allows the water chemistry to stabilize. Thus, the water doesn’t become corrosive and cause damage to your pipes or fixtures.

man adding salt pellets into a water softener

Maintain your water softener for optimal results.

Typically once a week, the softener will regenerate itself using salt, so homeowners need to occasionally check the tank’s salt level and refill it when indicated in the service manual.

“There’s also services available, which you can purchase, that can deliver salt to your home or even perform this type of routine salt maintenance for you,” says Eric.

When searching for a water softener

Always check to make sure you’re actually purchasing a water softener as this term is sometimes used in an unethical way.

“A lot of companies will use the term ‘softener’ to imply that a specific device softens water when it really isn’t,” says Eric.

Look for softeners that are certified to standard NSF/ANSI44. NSF stands for NSF International, and ANSI stands for the American National Standards Institute. Forty-four is the number of the standard.

“When you buy a water softener with this certification, you know it’s been tested and has proven its ability,” says Eric.

There’s another standard – IMOZ 601 – which covers alternative scale prevention devices, but “unfortunately there’s no products which have successfully been certified to that standard that I’m aware of yet,” says Eric.

Search water softeners independently certified by WQA to NSF/ANSI 44 now!

On a sodium- or potassium-restricted diet? Read this.

a glass of water being poured

Always consult your doctor before changing dietary habits.

Since water softeners use salt, homeowners on sodium-restricted diets should consult their doctor before installing a water softener system. This way, you can discuss options for water treatment systems.

“If you are on a restricted sodium diet, softeners are oftentimes installed so that there’s a separate tap for drinking water that is not softened,” says Eric. “You can also install something underneath the sink to remove the sodium.”

Homeowners on a potassium restricted diet should also consult their physicians as softeners sometimes use potassium to soften hard water as well.

Stay on top of home maintenance

Two cell phones with viphome app open on the screens

Homeownership can be hard, but it doesn’t have to be. The vipHome.app can help. In less than four minutes, enjoy a new way to manage your home. Simply download the app, register your home, and enjoy a simplified homeownership experience. Download the app today!

Google Play buttonApp Store button

Learn More

vipHomeLink-Glass-Water (1)

What’s in Your Water? How to Know Your Tap Water Is Safe (and Potable)

You may have heard of the water quality issues that have plagued Flint, Michigan, for years. Discolored, off-tasting, and foul-smelling water signaled a public health crisis due to lead contamination.

The pandemic further highlighted the importance of safe drinking water quality as homeowners have been spending more time at home than ever before. According to the 2021 Water Quality Association Consumer Opinion Survey, more than one third of homeowners are either concerned or very concerned about the quality of their household water supply.

It’s easy to see why. Many homeowners drink, bathe, and cook with the water that comes straight from the tap, but is it safe?

We reached out to Eric Yeggy, Technical Affairs Director for the Water Quality Association. Eric has a degree in chemistry from the University of Northern Iowa and spent more than 20 years in the environmental testing industry analyzing drinking water, ground water, and soil. Read below to learn tips from the WQA on how to check if your house water is clean and safe!

Is it safe to drink tap water in the U.S.?

person filling up glass pitcher at a kitchen sink

Be sure your water is safe to drink.

“Generally speaking, I would say we have some of the safest water in the world in the United States, but it’s not always harmless as we have seen in many cases,” says Eric.

As mentioned earlier, lead polluted the water in Flint, and though lead is dangerous and deadly, especially to children who are more susceptible, there are other contaminants that can make their way into a home’s drinking water, too.

The most common contaminants of private wells include arsenic, radiological contaminants, bacteria, and nitrate, but lead, copper, and disinfection byproducts are very common contaminants in municipal water. This list doesn’t include emerging contaminants such as polyfluoroalkyl substances (PFAS).


Two test tubes with water inside

Some chemicals are unregulated and may be in your drinking water.

“That’s the non-stick coating stuff and is used in firefighting foam,” says Eric. “PFAS is a class of chemicals that’s very dangerous and has made its way into our water supplies and our groundwater.”

These substances are nicknamed “forever chemicals” because they are not destroyed by any processes in nature.

“These [chemicals] are all unregulated,” says Eric, “so they’re not necessarily things that even your city would be testing for if you’re getting municipal water.”

Water contaminants can create a wide range of acute and chronic health issues. “Acute” issues include immediate reactions, such as bacteria that can make a person sick overnight or even nitrate that can cause baby blue syndrome and lead to death. “Chronic” health effects come from substances such as arsenic, which can cause cancer over a prolonged period of time.

There are also aesthetic water quality issues that homeowners may want to test for, such as hardness, iron, and manganese, which can damage appliances and plumbing.

“It’s very complex in terms of what is the most dangerous or what people should be concerned about,” says Eric.

How can you check your drinking water’s quality?

infographic about drinking water quality

The WQA provides a list of water treatment professionals on their website who, as WQA members, have agreed to abide by a strict code of ethical business conduct. These professionals can guide you on the contaminants for which you should test. The search tool also indicates whether the companies have certified professionals on staff, which is above and beyond what the ethical code requires.

“These professionals have pursued technical training, taken and passed a test, and are doing ongoing continuing education to maintain that certification,” says Eric.

Many water treatment professionals will also do the testing for you, but for health-related contaminants you should confirm that they are using a certified drinking water laboratory. Some aesthetic contaminants such as hardness and pH can be accurately tested in the home.

Private well owners also should contact their county health department.

“The county health department probably may have a list of all the contaminants that have been found in the aquifers in your area, so they can help you decide what you need to test for.”

Eric Yeggy, Technical Affairs Director for the Water Quality Association


They may also be able to do testing for free or give you testing at a discounted rate.

You can also reach out to the EPA Drinking Water Hotline or conduct a state search online. Many states publish reports about the contaminants they’ve found in the aquifers and drinking water supplies as well as the water quality standards for drinking water.

Certified drinking water laboratories in your area may also have developed test packages based on common drinking water contaminants and can be a great resource to consult with when you are deciding what to test.

Homeowners can also contact WQA or consult free resources offered through the WQA website.

Before you hire a water professional

Person wearing rubber glove putting water into a test tube

Ask your water professional questions.

If your professional is completing a precipitation test to show the hardness of the water, the test uses chemistry and electricity to cause the minerals in your water to turn color, generally a very dark brown or blackish color. This test can be done in an ethical way and an unethical way.

“If the water treatment professional tries to convince you that [the dark color of the water] is a sign of pollution or dangerous chemicals in your water, then you’re dealing with someone who’s either unethical or does not know what they’re talking about.”

A professional saying the test shows “all the pollution you’ve been drinking” is a clear red flag. A precipitation test does not show pollution.

This test is a very simple and reliable way to determine the level of hardness of your water.

Are home water quality test kits accurate?

Electric kettle with boiling water

Are you testing for hard water?

If you’re testing hardness in water, a water quality test from a big box store can be a viable option. When testing for health-related contaminants in water samples, contact a certified drinking water laboratory.

Explains Eric, “There’s some home test kit for lead, but they only capture dissolved lead. If you were following any of the stories like Flint, Michigan, more than 90% of the lead that was impacting people was particulate lead, meaning it was in a solid form that won’t be picked up by that type of test. Testing for particulate lead requires a heated-acid digestion, and that’s why you have to send it to a laboratory.”

Your drinking water isn’t as clean as you thought. Now what?

“The laboratory that did the testing should be able to tell you what the results mean,” says Eric.

The laboratory can advise if you’ll need to investigate further or stop drinking your tap water immediately. Some issues can easily be resolved, while some may require more drastic measures.

“If bacteria is the only issue, boiling the water can make it safe to drink and provide you with the short-term solution,” explains Eric. “If it’s chemicals, they can’t be removed by boiling.”

Using bottled water can also protect the health of your family until you have a more permanent solution in place.

4 water jugs with another one stacked on the top

Bottled water can be a short-term solution.

For long-term solutions, you can install an in-home treatment system which has been tested and certified by independent third-party agencies to remove common chemical contaminants. The WQA’s website lists products that are certified to remove a specific list of contaminants, and the certification includes more than just performance.

Explains Eric, “It also looks at safety and structural integrity, which by safety, we mean, ‘What are the materials that are used to construct that product?’ Those materials are going to be in contact with your drinking water. We test them to make sure that they’re not going to be leaking any harmful chemicals into your drinking water.”

The WQA also tests the structural integrity of these products to ensure they won’t leak or burst in your basement or under your sink, which can lead to expensive damage and other health concerns, such as mold. 

Filter out the contaminants

There are many different types of treatment technologies that are available for in-home use. Some of the common ones are water filters, softeners, reverse osmosis, and UV. Each of these technologies has strengths and weaknesses and is specifically designed for maximum removal of a set of specific contaminants.

Treat at the tap

close up on water dripping from a faucet

Treat at the tap

Lead is one of the most common contaminants, but it can be difficult to tell if it’s coming from the plumbing in the home or from the public water system. Even plastic pipes in a home might have brass and bronze fittings, which could contain lead.

“We always recommend treating for lead at the point of use, at the sinks where you’re going to be drawing water for drinking and cooking,” says Eric.

The one thing homeowners need to know about their home’s drinking water

“In the world of chemistry, we refer to water as a universal solvent,” says Eric. “That’s because it’s capable of dissolving more substances than any other liquid we know.”

This is why the WQA always recommends homeowners test their water in the home. Each home is unique, and even private wells that tap the same aquifer can have vastly different water quality levels.

woman drinking water at a desk

Water quality can be unique to each home.

“We saw this play out in Flint where you had some homes where they had definitely dangerous levels of lead, whereas other homes had lead that was literally hazardous waste levels,” says Eric. 

Water can dissolve many substances and become contaminated, even if it was pristinely pure when it left the treatment plant. By the time it reaches your home, it can be vastly different and potentially dangerous.

Water you waiting for? Learn more!

The best thing you can do for your home is learn about water quality and how to mitigate any contaminants. The WQA offers a free download of Water Treatment for Dummies that provides an overview of the various treatment technologies, information on specific contaminants questions, and questions to ask a water treatment professional before signing a contract.

The Water Quality Research Foundation also publishes scientific research on energy savings for softening water and offers a contaminant occurrence map, which may help you decide what to test for in your water.

Private well owners should check out the Private Well Class, a free online resource center with webinars and training videos that teach you how to protect your well and what to do when your well needs attention. We also spoke with Eric regarding well water safety on the vipHome Podcast!

Homeowners can also consult the Water Quality Association’s website for help finding a local water treatment professional who can help you test and treat your water or for lists of certified water treatment products, among other free resources.

Keep your home safe and secure

Two cell phones with pictures of the vipHomeApp on them Homeownership can be hard, but it doesn’t have to be. The vipHome.app can help. In less than four minutes, enjoy a new way to manage your home. Simply download the app, register your home, and enjoy a simplified homeownership experience. Download the app today!

Learn More

two hands holding the ends of braided metal hoses

5 Reasons Braided Metal Hoses Should Be in Your Home

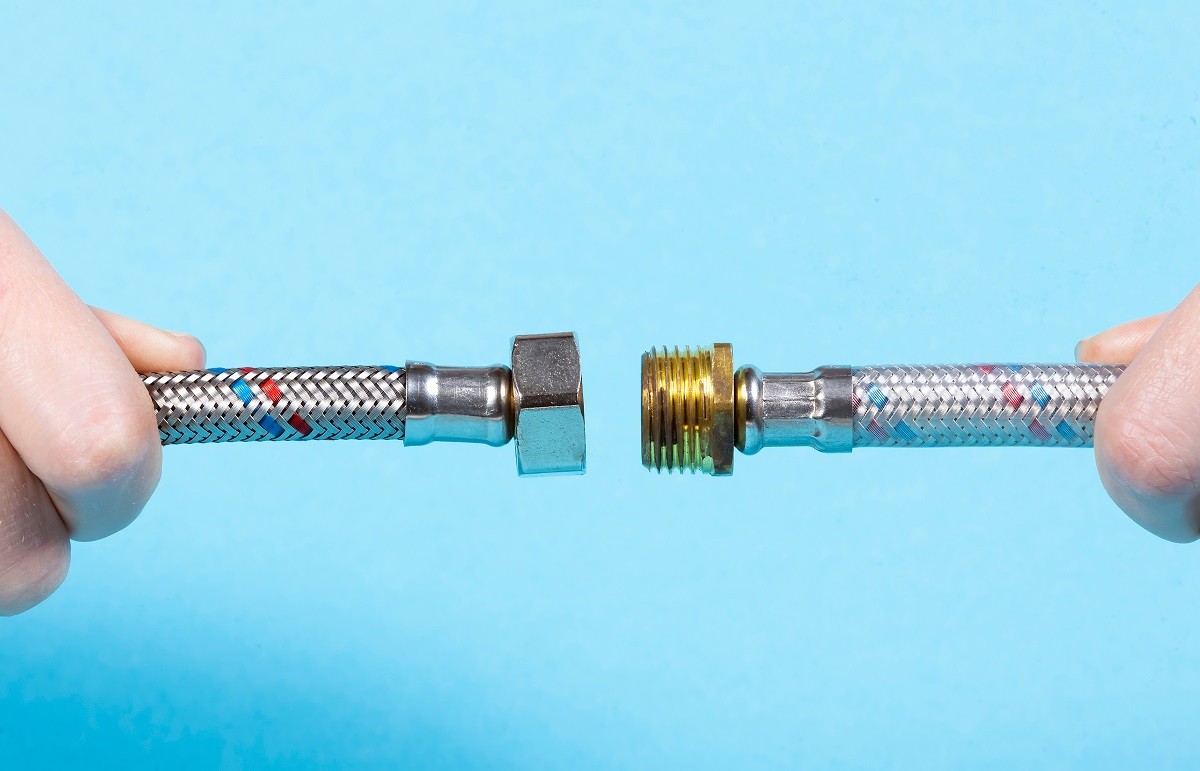
Homeownership can be difficult, but some quick additions can potentially save you thousands of dollars. One of these easy solutions is installing a braided metal hose or stainless steel braided hose.

But why exactly should you install these small – and cost-saving – hoses on your appliances?

For that answer, we reached out to Tom Mahoney of Little Tommy’s Plumbing Shop. Tom has been in the plumbing business since 1989, and his family has been helping homeowners to fix their plumbing issues for more than 60 years.

Tom has five reasons why braided metal hoses should be in your – and everyone’s – home.

Reason #1 – Braided metal hoses are burst-proof

 
a large puddle spreading across a kitchen floor
This could be your home.

When it comes to steel braided hose vs. rubber, there is no competition.

“Braided metal hoses are advertised that they’re no burst,” explains Tom, “so usually when rubber bursts, it expands like a bubble.”

Conversely, the braided hose gives the inside rubber hoses a little flexibility, but it can’t leak because the metal holds in the rubber.

But do braided washing machine hoses ever burst?

“Not that I’ve seen and we’ve got thousands of them out there,” says Tom.

Reason #2 – Braided metal hoses last “forever”

a braided metal hose attached to a toilet
These hoses are only replaced along with an appliance or fixture.

You may be thinking, “How long do stainless steel braided hoses last?” The answer is – a pretty long time. Some experts say they should be changed every five to eight years, and others have yet to see one burst.

You may want to glance at your hoses every so often to make sure they’re in good-working order – just in case. However, most homeowners will never need a braided metal hose replacement. In fact, these hoses are only replaced when a new faucet or appliance is installed.

“If we’re replacing or repairing a toilet, we replace the hoses at the time, depending on their look,” says Tom. “We’ll do it as part of our plumbing check for our regular clients, but I’ve never had an issue with these that I know of.”

Reason #3 – Braided metal hoses are super easy to install

a homeowner in orange gloves tightening a braided metal hose on a toilet
All you need is a wrench.

You only need basic hand tools to switch rubber washing machine hoses for braided metal ones. (Content Director Susie used a wrench, though a small hand tool came with her steel braided hose kit.)

Before you install, you do need to make sure the hoses are the proper length, though.

“You don’t want them stretched as tight as they can,” advises Tom. “Have a little play in there. They come in different lengths obviously, so you don’t want them to stretch really tight.”

Reason #4 – Braided metal hoses are inexpensive

While the cost (and length) may vary, braided metal hoses for washing machines generally cost less than $50 per hose. This is an incredible savings when compared to the average cost of a water damage claim ($10,849, according to the Insurance Information Institute).

Reason #5 – Braided metal hoses can save your home

a blue-painted utility room with a washer, dryer, and hot water heater
Washing machines need braided metal hoses.

Braided metal hoses can be found throughout your home, helping to save your kitchens and bathrooms from a hose fail and subsequent water damage.

“You can use them on basically any faucet or toilet supply,” says Tom. “They have them for dishwashers, ice makers, and washing machines.”

However, the most important place braided lines should be is on second-floor appliances.

“The biggest tip I tell people is – if you have first floor laundry facilities or second floor, braided hoses should be automatic,” says Tom. “When a rubber hose bursts, it gets catastrophic pretty quickly.”

Stay on top of home maintenance

Two cell phones with pictures of the vipHomeApp on them

Homeownership can be hard, but it doesn’t have to be.The vipHome.app can help.In less than four minutes, enjoy a new way to manage your home. Simply download the app, register your home, and enjoy a simplified homeownership experience.

Download the app today!

Learn More

a silver faucet that drips into a bathroom sink

How to Save Your Pipes When No Cold Water in Your Faucet

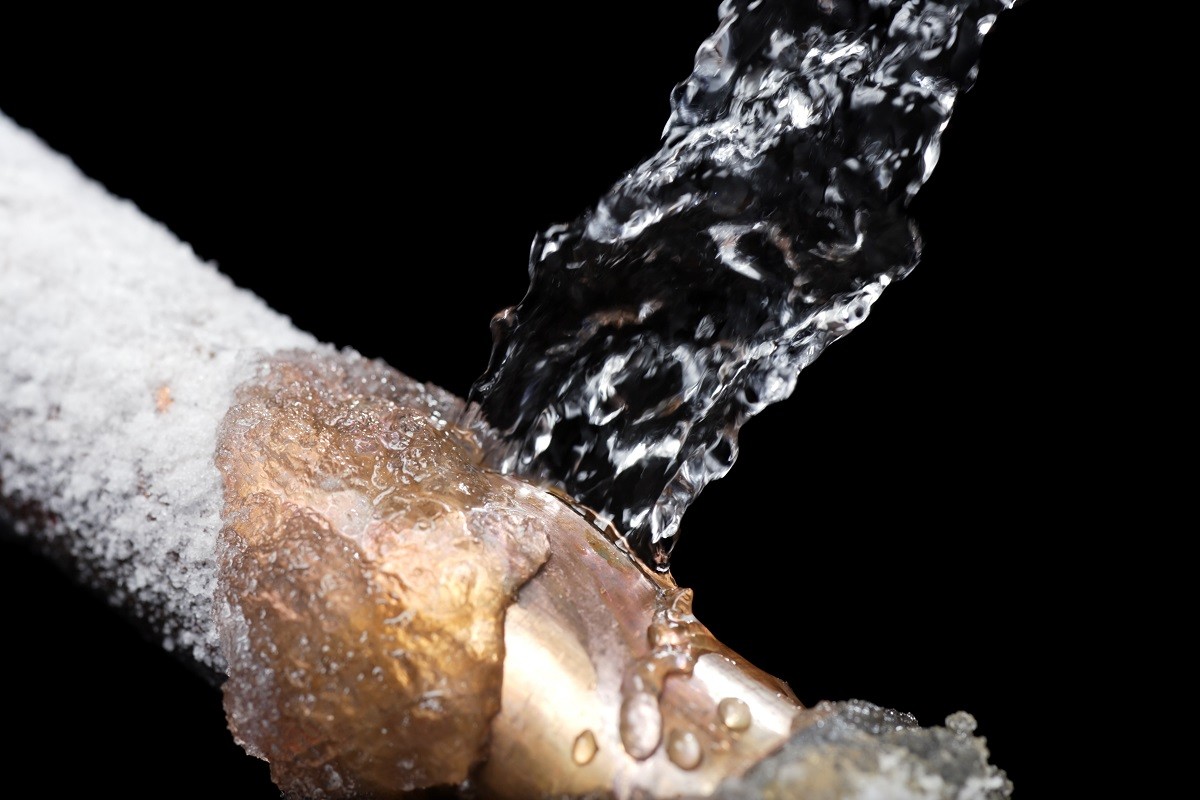
Baby, it’s cold outside, and unfortunately, your kitchen sink is along an outside wall. After a few days of below-freezing temperatures, the cold water is no longer flowing through your faucet. What do you do? We spoke with Jeff Hoffmann from Schaible’s Plumbing & Heating Inc. to find out how to save your pipes and prevent costly, life-disrupting water damage.

Immediate steps: Warm your pipes

  1. Turn the cold faucet into the on position and leave it open.
  2. Open the kitchen cabinet (or wherever your freezing pipes are, if possible) and let some of the heat from your house get into that area.
  3. Get a heat source on the wall or pipe that is frozen. Try a space heater or a hairdryer and focus it directed on that outside wall or the problem pipe.

By warming the area, you may be able to melt any ice that has formed inside the pipes and get the water moving again.

This philosophy works for shower pipes, too, or any pipes that are frozen, which are generally along exterior walls or in cabinets or crawl spaces. Hopefully it just started to freeze and hasn’t expanded to burst that pipe.

If you woke up to no water

If you went to sleep and woke up to a pipe that’s frozen, you might not know if the pipe is split. You might not even know of an issue until the pipe thaws and water manifests in a leak. If that’s the case – check out these quick steps to turn off the water to that area.

Repeat offender: How to prevent a broken pipe

gray cat looking at dripping kitchen faucet
Leave your faucets on trip to keep the water moving.

Ideally, you want to avoid these situations in the future. Just because you managed to thaw your pipes this time, doesn’t mean you always will. If there’s a longer stretch of colder temperatures, the pipes may eventually burst.

Take the following steps to prevent a problem:

  • Open that cabinet or freezing area and put heat on those pipes.
  • Leave the faucet “drip open,” not fully on but enough so there’s water flow. If there’s constant movement, the pipes can’t freeze.
  • Insulate pipes properly.
  • Use low voltage wire that straps right to the pipe with insulation. The wire plugs right into the wall and will keep the pipes above freezing temperatures.

If you have pipes in an attic or a crawl space and there’s nowhere else to put them and there’s no other way to protect them – then heat tape products work very well (it’s best to have these installed by professional plumbers). All that’s really needed is a working outlet.

Save your home

Homeownership can be tough. We make it easier. The vipHome.app is designed to help you save time and money by preventing problems and even insurance claims. Simply download the app, register your home, and enjoy a simplified homeownership experience.

Download the app now!

Learn More