One of the most frightening noises in your bathroom is the sound of your toilet not filling properly. Depending upon your comfort level with diy projects, you might decide to call a plumber, but here at the vipHome.app, we believe you can fix this issue.
First, we’re going to tell you how to clean the valve, and if that doesn’t work, we’re going to help you replace the water valve assembly in your toilet tank. (Go you!)
(Please note: Our Digital Content Manager Susie (me!) cleaned and later replaced the Kohler Genuine Part GP1083167 using the silent fill valve kit. When completing a toilet water valve replacement with other toilets and/or parts, some steps may differ, but this guide should give you an overview of the process.)
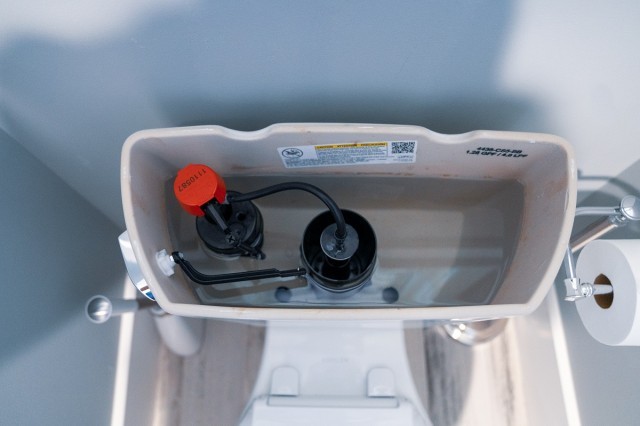
Step 1: Take off the toilet cover
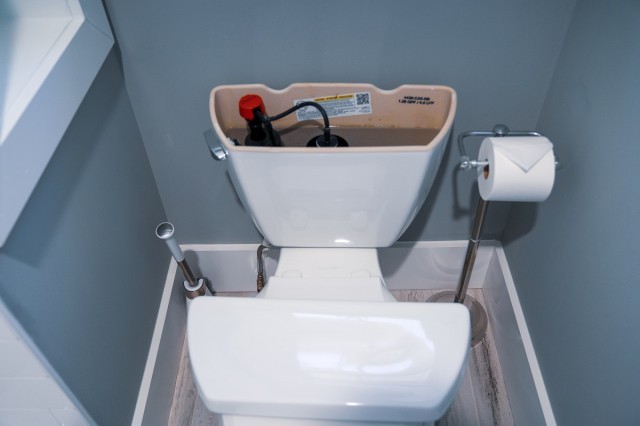
Look inside the tank. Depending on your type of toilet, you may see two pipes (the valve assembly and the overflow pipe).
What you need to inspect is the valve assembly on the left-hand side of the tank. It might appear to have a red or gray cap. If water is flowing out the top of the cap, this is a problem.
Step 2: Clean the valve assembly

If you have hard water, you might have some sediment stuck in the valve. Clean the valve with these quick steps:
- Grab two plastic cups, one filled with vinegar.
- Turn off the water to your toilet. (Toilets have shut off valves on the side. Turn the knob counterclockwise or flip downward.)

- Start by taking off the cover and flushing the toilet.
- Press down on the valve assembly cap (like a pill bottle) and turn counterclockwise to release.
- Take the washer off the bottom of the cap and place it in the cup with vinegar. Let it sit for a few minutes to wash away any mineral buildup.
- Then place a different cup upside down over the open valve and turn the water back on. Be careful! Water will forcibly shoot up and into the cup. Allow the water to run for 30 seconds, and then shut off the water again.
- Once the washer has soaked, place it back into position under the cap. Press down again, and this time, turn the cap clockwise.
- Turn back on the water.
If the toilet tank fills normally, way to go! You fixed the issue! But if the valve continues to spew water from under the cap, you’ll need to replace the valve assembly.
Step 3: Order the correct part
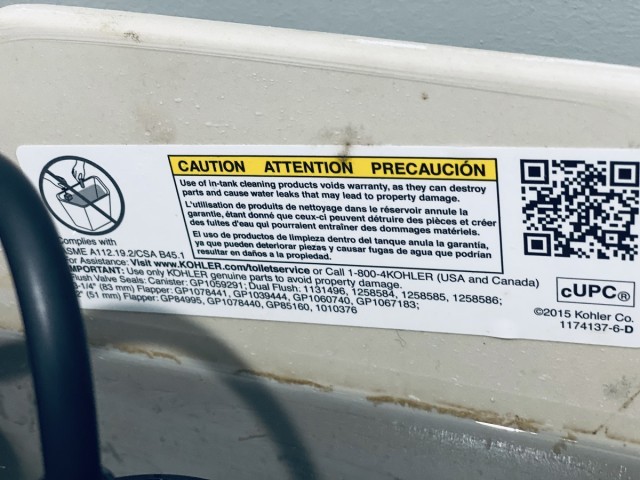
On most toilets, you’ll find the type of valve assembly on a sticker on the wall of the tank. If you’re like me, then you might not know what all those numbers mean.
Instead, get the numbers off the top of the valve’s cap and insert them into a Google search. Your toilet’s valve assembly should show up in the results with the serial number. Compare that number to the ones on the tank sticker to find the correct part.
Order. Ours cost less than $20 and arrived less than a week later, but you can also pick one up at a local hardware store.
(Once you know the specific part, you can add the serial number to the Notes section of the vipHome.app!)
Step 4: Replace the valve assembly
Easier said than done – we know, but this is a relatively easy task that shouldn’t take more than 15 minutes. You’ll need a bucket, a garbage bag, an adjustable wrench, and a plastic cup. (If you don’t have a bucket, then grab a towel you can throw away or bleach.)
- First, lay a garbage bag down under the valve’s opening and put a bucket on top of it. If you don’t have a bucket, lay down your worst towel.
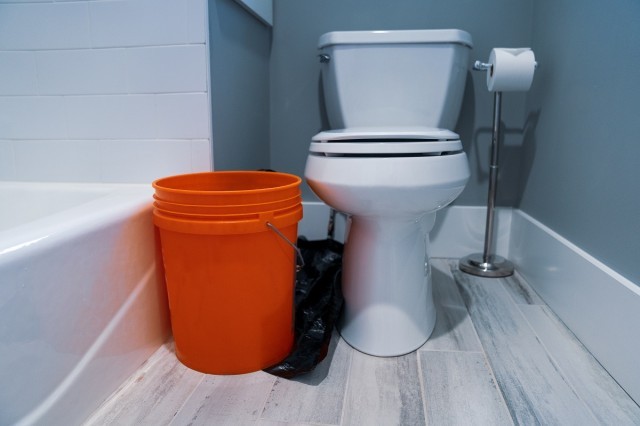
(Water damage is a bigger expense than the toilet part and can lead to more issues, like mold growth.)
- Turn off the water to the toilet again, flush, and use the plastic cup to scoop out as much of the excess water as you can.
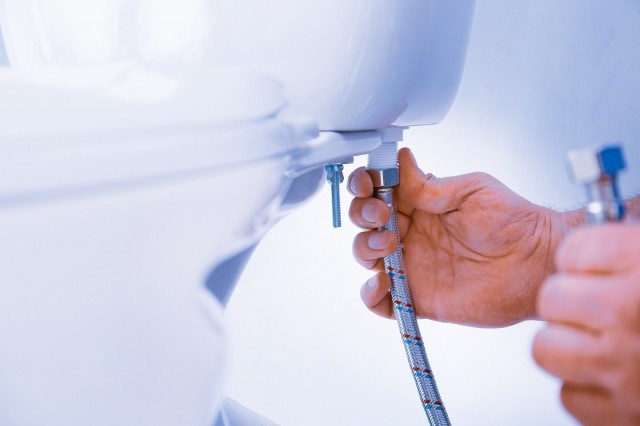
- Disconnect the water supply line that leads into the tank.
- Inside the tank, wiggle the overflow tube free from the valve.
- Unscrew the plastic lock nut, which holds the valve’s pipe to the tank. You may need to use an adjustable wrench.
- Lift the valve assembly from the tank (and watch as water from the tank falls into your bucket or onto the towel). Take note of the color of the connector on the side of the valve.
- Next, attach the corresponding connector to the assembly. (Your replacement kit should come with a few different color connectors. If your old valve had a red connector, use a red connector.)
- Measure the new base against the old base. If the length of the new one is shorter, unscrew the lock ring in the middle and give the valve bottom a swift tug to adjust the height. Re-tighten the ring.
- Insert the valve into the hole in the bottom of the tank and tighten the nut on the outside. Use the wrench to tighten the lock nut a quarter turn.
- Reconnect the water hose outside the tank. Tighten the metal washer.
- Reconnect the overflow tube in the tank.
- Turn back on the water at the shutoff valve. The tank should refill normally.
- If the water levels aren’t the same (you can tell from the lines on the side of the tank), then you’ll need to adjust the adjustment clip or screw that maintains the level of the float cup.
- Replace the toilet’s cover.
Congrats! You’ve now replaced the water valve assembly. If you had any difficulties during this process, contact a professional plumber.
Looking for more home maintenance advice?
Homeownership can be hard, but it doesn’t have to be. The vipHome.app can help. In less than four minutes, enjoy a new way to manage your home. Simply download the app, register your home, and enjoy a simplified homeownership experience.
Get it today!